How to Make Fujifilm Look Like Kodak Film Straight in JPEG
Learn how to make Fujifilm look like Kodak film using verified in-camera settings, warm white balance shifts, and our free Fuji film stock matcher now.
Many digital photographers want to make Fujifilm look like Kodak film without spending long hours editing raw files. You can capture that iconic Fujifilm Kodak look directly inside your camera by combining specific film simulation settings. Building a reliable Kodak film recipe Fuji setup takes only a few minutes once you understand color shifts. Our free Fuji film stock matcher pairs your exact camera body with tested recipes for warm analog tones. Whether you shoot street scenes, family portraits, or sunny holiday landscapes, in-camera JPEG recipes deliver instant film characters.
This complete guide walks you through verified camera settings so every straight out of camera frame feels nostalgic.
Why Photographers Make Fujifilm Look Like Kodak Film Today?
Shooting digital cameras becomes much more rewarding when you make Fujifilm look like Kodak film right at capture. Eastman Kodak negative and slide emulsions are famous for golden warmth, smooth highlight roll-off, and flattering skin tones.
Here are the main reasons photographers choose an in-camera Fujifilm Kodak look over desktop preset packs today:
- Golden skin tones come from official Kodak Portra emulsions that deliver smooth, natural portrait reproduction in outdoor daylight.
- Warm amber shadows define classic consumer stocks like Kodak Gold 200 across midtones and sunny afternoon street scenes.
- Vivid daylight colors from Kodak Ektar 100 and Ektachrome E100 bring ultra-vivid saturation and fine grain outdoors.
- Zero desktop editing happens when you load a custom Fujifilm recipe that renders finished analog JPEGs at capture.
- Consistent travel albums stay effortless when you lock one warm recipe into your camera custom slots for trips.
- Lower shooting costs let you enjoy analog film discipline every day without paying for rolls and lab scans.
Read our Fujifilm SOOC guide and our JPEG versus RAW guide to see why in-camera rendering wins.
How Fujifilm Film Simulations Build Your Warm Kodak Looks?
Every Kodak film recipe Fuji photographers love starts by selecting the right built-in Fujifilm Film Simulation mode first. Fujifilm engineered twenty distinct color and monochrome simulations that reshape tonal curves and color response before saving JPEGs.
Here are the six official Fujifilm simulations that form the strongest foundation for classic Kodak film stocks:
1. Classic Chrome for Documentary Kodak Tones
Fujifilm created Classic Chrome to replicate twentieth-century photojournalism magazines with muted saturation and cool, composed shadow rendering. Because Classic Chrome suppresses magenta and softens color intensity, it provides a clean canvas for warm white balance shifts. Verified FujiPic recipes like Portra Sol Chrome and Kodak Softlight use Classic Chrome to emulate warm daylight stocks.
2. Classic Negative for Punchy Street Warmth
Classic Negative separates warm highlights from cooler shadows to create a lively, high-contrast look for everyday street scenes. When you pair Classic Negative with daylight white balance, indoor tungsten lights glow gold while window light stays honest. FujiPic recipes such as Marigold Afternoon and Film Reel Gold use this base for rich, nostalgic street colors.
3. Nostalgic Negative for Amber Seventies Color
Fujifilm designed Nostalgic Negative around the New American Color movement to infuse shadows and highlights with warm amber. Instead of letting shadows sink into cold blue or green, this simulation keeps skin tones rich under backlight. On newer cameras, recipes like Kodak Sunwashed use Nostalgic Negative for golden market walks and sunny travel days.
4. Eterna for Soft Motion Picture Negatives
Eterna delivers flat, understated contrast with soft highlights that mimics motion picture negative stocks in mixed indoor light. Lowering highlights and shadows on top of Eterna creates a calm, mellow atmosphere for overcast streets or interiors. You can load Kodak Pale Holiday on Eterna whenever you want dreamy contrast and consistent cinematic video tones.
5. Velvia for Vibrant Kodak Slide Emulsions
On the opposite end, Velvia pushes saturation and contrast hard to emulate vivid reversal slide films like Ektachrome. Deep blues and punchy greens jump forward under bright sun, making coastal views and mountain trails pop naturally. Our verified Kodak Vivid Slide recipe pairs Velvia with strong small grain for dramatic golden hour landscapes.
6. Acros for Classic Kodak Tri-X Monochrome
Acros is Fujifilm’s dedicated black and white simulation built to replicate silver-halide tonal gradations and rich shadow depth. Adding the Yellow or Red filter variant darkens blue skies and boosts midtone contrast just like optical glass filters. Pairing Acros with strong grain and positive shadow tone recreates the gritty documentary punch of classic Kodak Tri-X.
Open our free Film Simulation Picker right now to answer five quick questions and find your ideal base.
Seven Camera Settings That Create Your Fujifilm Kodak Look
Selecting a base simulation is only step one when you want to make Fujifilm look like Kodak film. You must adjust seven internal JPEG parameters so your digital sensor softens clinical sharpness and mimics analog halation.
Here are the seven in-camera parameters that turn a standard profile into a finished Kodak film recipe:
- White Balance and Shift let you pick Auto or Daylight and push Red positive and Blue negative for warmth.
- Diagonal grid movement matters because Fujifilm rotates its Red and Blue grid roughly forty-five degrees from standard sliders.
- Visual shift previewing on our free WB Shift Visualizer shows live color casts on skin, sky, and foliage.
- Dynamic Range settings like DR200 and DR400 protect bright sky highlights by underexposing capture and lifting midtones smoothly.
- Strong highlight protection is why most tested Kodak recipes use DR400 so sunny clouds never clip into white.
- Minimum ISO floors rise by one stop at DR200 and rise by two full stops when using DR400.
- Highlight and Shadow curves use negative values to flatten harsh digital contrast and replicate forgiving negative film latitude.
- Softening bright areas between minus one and minus two keeps sunlit foreheads and bright walls gentle and natural.
- Shaping shadow depth toward minus two creates airy pastel tones while plus two adds punchy slide film depth.
- Color saturation controls use positive numbers to boost warmth and vibrancy or negative numbers for restrained documentary skin.
- Color Chrome effects deepen tonal gradation inside saturated reds and greens while FX Blue adds rich density to skies.
- Negative Clarity and Sharpness remove clinical digital edge crunch so warm afternoon light blooms softly across your frame.
- Grain Effect and Noise Reduction at minus four with Weak or Strong grain preserve authentic analog silver texture.
Check our White Balance Shift guide and our DR400 vs DR200 guide to master these two core controls.
Using Our Free Fuji Film Stock Matcher for Instant Recipes
Scrolling through hundreds of random forum posts makes finding a dependable Kodak film recipe Fuji setup frustratingly slow. Our interactive Fuji film stock matcher filters ninety-one tested recipes across twelve classic film stocks and fifteen camera bodies.
Here are the four simple steps to find and load your exact Kodak match using our free tools:
Step 1: Select Your Target Kodak Emulsion
Start by opening the Fuji film stock matcher and picking the exact Kodak look you want to emulate. You can choose warm portrait negatives like Portra 400, punchy monochrome like Tri-X, or vivid slide stocks. The tool is completely honest about which analog characteristics Fujifilm cameras match closely and where digital sensors differ.
Step 2: Filter Results by Camera or Sensor
Next, apply the optional camera filter or check the Fujifilm sensors page to match your exact hardware generation. Two cameras sharing the same sensor and processor render identical JPEGs, while different sensor generations shift blue tones. Filtering by your specific body ensures every parameter in the recipe exists inside your camera menu right now.
Step 3: Preview White Balance and Sample JPEGs
Click into your matched recipe card to inspect unedited straight out of camera sample frames across real scenes. If you already have a reference photo in mind, upload it into our Fujifilm Recipe Finder for fit scores. Every result displays a percentage match score and a clear one-line explanation showing why those colors fit.
Step 4: Save Settings Into Custom Slots C1-C7
Open your camera shooting menu, select Edit/Save Custom Setting, and enter each listed value in exact menu order. Bodies like the X-T5, X100VI, and X-T50 provide seven slots, while the X-S10, X-S20, and X-M5 offer four. Once saved, you can recall your finished Kodak film look instantly without touching a computer or mobile editor.
Explore our beginner recipe guide and our custom recipe building guide to organize your custom slots.
Verified Kodak Film Recipe Fuji Settings Across Every Body
Every recipe in the FujiPic recipe library is tested in real lighting conditions with complete parameter tables. Comparing verified recipes side by side helps you pick the right Fujifilm Kodak look for your exact sensor.
Here are five community-tested Kodak-inspired recipes from our catalog with their exact in-camera settings and sensor compatibility:
| Recipe Name | Base Simulation | Sensors Supported | Dynamic Range | Tone & Clarity | White Balance & Shift | Grain & Chrome FX |
| Portra Sol Chrome | Classic Chrome | X-Trans IV, GFX | DR400 | H -2, S -2, Color +3, Clarity -1 | Auto WB, R +2 / B -6 | Grain Off, FX Strong, Blue Off |
| Quiet Portra 170 | Classic Chrome | X-Trans V, GFX | DR Priority Auto | H 0, S 0, Color 0, Clarity -2 | Daylight, R +4 / B -5 | Weak Small, FX Weak, Blue Weak |
| Kodak Softlight | Classic Chrome | X-Trans V, GFX | DR400 | H -1.5, S -1, Color +3, Clarity -2 | Auto White Priority, R +2 / B -4 | Weak Small, FX Strong, Blue Weak |
| Kodak Vivid Slide | Velvia | X-Trans IV, V, GFX | DR400 | H +1, S +1, Color +2, Clarity +1 | Auto WB, R +2 / B -2 | Strong Small, FX Strong, Blue Strong |
| Kodak Pale Holiday | Eterna | X-Trans IV, GFX | DR400 | Soft lowered highlights and shadows | Cool bluish cast shift | Dreamy indoor and video texture |
- Portra Sol Chrome is tuned for X100V, X-T4, and X-Pro3 cameras to soften contrast during sunny coastal walks.

- Quiet Portra 170 runs on X-T5, X100VI, and X-H2 bodies using Daylight white balance for organic outdoor warmth.

- Kodak Softlight pairs Auto White Priority with R+2 and B-4 on X-Trans V so greens and browns pop.

- Kodak Vivid Slide builds on Velvia with positive tone curves to deliver deep blues during golden hour.
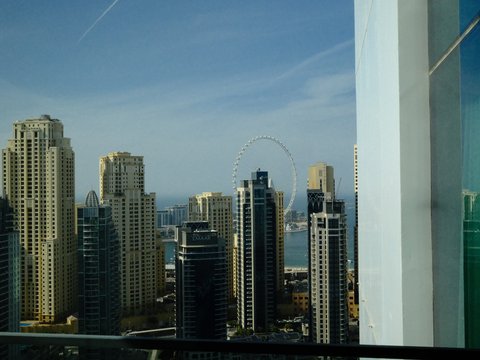
- Kodak Atelier Reserve and Kodak Sunwashed deliver deeper vintage warmth for outdoor markets and late afternoon streets.
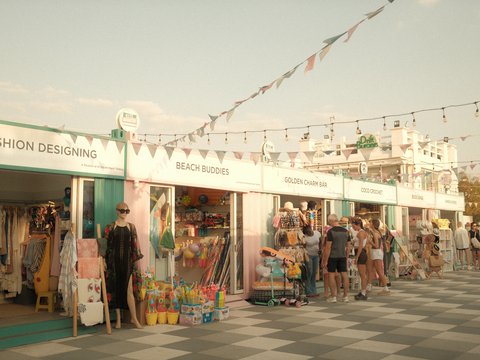
- Film Reel Gold uses Classic Negative with straight Daylight white balance so indoor tungsten lamps glow rich gold.
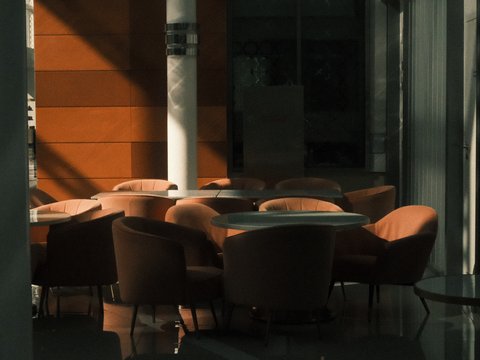
Visit our Fujifilm Tools hub to open the Film Stock Library and browse every verified Portra 400 emulation.
How White Balance Shifts Create Authentic Kodak Film Tones?
The secret sauce behind almost every Kodak film recipe Fuji photographers shoot is the Red and Blue shift. Understanding how base white balance interacts with coordinate shifts prevents unnatural orange skin or muddy green shadow casts.
Here are the core rules for tuning white balance shifts when chasing a warm analog Kodak aesthetic:
- Diagonal grid shifts push Red positive and pull Blue negative across Fujifilm’s rotated grid for golden Kodak warmth.
- Daylight or Shade presets beat Auto white balance at sunset because Auto neutralizes warm orange golden hour light.
- Auto White Priority in Kodak Softlight keeps warm indoor bulbs from turning café scenes excessively orange.
- Custom Kelvin values like 4500K or 5500K lock color consistency across every frame in an outdoor portrait series.
- Fluorescent white balance presets combine with R+1 and B-6 in Vintage Amber to create warm urban street tones.
- Separate base presets on older X-T3, X-T2, and X100F cameras let you save unique shifts in each slot.
Matching Classic Kodak Stocks to Your Fujifilm Sensor Type
Your camera sensor and processor determine which film simulations exist and how deeply blue skies render in JPEGs. Checking the Fujifilm cameras directory before loading settings ensures your Kodak recipe renders exactly as the creator intended.
Here is how different Fujifilm sensor families handle Kodak-inspired recipes and what to adjust on each generation:
- X-Trans IV Bodies (X100V, X-T4, X-Pro3)
Fourth-generation X-Trans CMOS 4 sensors pair with X-Processor 4 across popular bodies like the X100V, X-T4, X-E4, and X-S10. These cameras introduced Classic Negative and Color Chrome FX Blue, making them ideal for Portra Sol Chrome and Marigold Afternoon. Note that early X-T3 and original X-T30 bodies lack Clarity and Grain Size controls, so skip those two lines.
- X-Trans V Bodies (X100VI, X-T5, X-H2)
Fifth-generation cameras add Nostalgic Negative and Reala Ace while rendering deeper blues in Classic Chrome, Classic Negative, and Eterna. When moving an X-Trans IV Kodak recipe onto an X-Trans V body, Color Chrome FX Blue must be stepped down. Use our free Fujifilm Recipe Converter to translate any Kodak recipe between X-Trans IV and X-Trans V automatically.
- Hybrid Bodies (X-S20, X-M5, X-T30 III)
The X-S20, X-M5, and X-T30 III combine a twenty-six megapixel X-Trans CMOS 4 sensor with the newer X-Processor 5. Because film simulations live inside the processor, these hybrid cameras include Reala Ace and render blues closer to X-Trans V. Our converter tool handles these hybrid edge cases automatically so your Kodak colors stay accurate on every body.
- GFX Medium Format Bodies (GFX100S, GFX100 II)
Fujifilm GFX cameras use a larger Bayer CMOS sensor rather than an X-Trans array, but share the exact same simulations. Recipes like Quiet Portra 170, Kodak Softlight, and Kodak Vivid Slide are verified on GFX bodies. The wider dynamic range of medium format sensors makes soft Portra highlight roll-off look especially smooth in natural light.
Check our golden hour recipes guide and our cloudy weather recipes guide to adapt Kodak looks across weather.
Exposure and Dynamic Range Rules for Warm Kodak Highlights
Real Kodak color negative film loves slight overexposure, while digital sensors clip permanently if you push highlights too far. Balancing your exposure compensation dial with DR400 gives you that airy analog glow without blowing out bright skies.
Here are five practical exposure habits that make your in-camera Kodak recipes look convincingly analog in the field:
- Slight positive exposure between plus one-third and plus one stop gives Portra-style recipes airy, glowing skin tones outdoors.
- Careful highlight monitoring on your histogram prevents saturated reds and bright clouds from clipping when shooting Kodak Vivid Slide.
- DR400 highlight headroom protects two extra stops of bright sky detail when shooting midday streets or sunny beaches.
- Testing DR100 on overcast days restores natural midtone contrast and lowers your minimum ISO when grey clouds flatten shadows.
- Capping Auto ISO at 6400 alongside Noise Reduction at minus four keeps grain texture crisp across evening walks.
Common Mistakes When Programming a Kodak Film Recipe Today
Even experienced shooters sometimes load a popular Kodak film recipe Fuji setting and wonder why their JPEGs look off. Most color problems trace back to sensor mismatches, indoor lighting conflicts, or leaving digital noise reduction turned up.
Here are the five most common mistakes to avoid when setting up your Fujifilm Kodak look in camera:
- Ignoring sensor blue rendering when copying X-Trans IV recipes onto X-Trans V bodies makes skies look overly deep.
- Using outdoor Kodak recipes like Portra Sol Chrome or Quiet Portra 170 under studio flash creates unnatural skin casts.
- Leaving Noise Reduction positive smudges fine details, whereas setting minus four preserves authentic silver grain structure in JPEGs.
- Keeping strong warm shifts under heavy grey clouds can make rainy street scenes look overly yellow and muddy.
- Forgetting Clarity processing lag slows down burst shooting, so set Clarity to zero whenever you photograph fast action.
Final Steps
Learning how to make Fujifilm look like Kodak film lets you spend less time editing and more time shooting. Once you load one verified Kodak recipe into your C1 slot, every frame carries a warm character straight from the camera.
Here is your simple three-step action plan before you head outside for your next walk or weekend trip:
- Match your film stock by opening the free Fuji film stock matcher and filtering for your Fujifilm body.
- Program one custom slot with Kodak Softlight or Portra Sol Chrome and shoot it for one full week.
- Explore the full library of tested Fujifilm recipes and read practical setup guides on the FujiPic blog anytime.
Head over to our free Fujifilm tools page to match, visualize, and convert your Kodak recipes without guesswork.
FAQ
1. How Do I Make Fujifilm Look Like Kodak Film?
You can make Fujifilm look like Kodak film by combining a base simulation like Classic Chrome with warm shifts. Softening highlights and shadows while lowering sharpness and noise reduction removes harsh digital edges from your camera JPEGs. Use our free Fuji film stock matcher to find tested Kodak settings for your exact camera model instantly.
2. Which Fujifilm Simulation Is Closest to Kodak?
Classic Chrome, Classic Negative, and Nostalgic Negative are the three closest starting points for warm Kodak negative film looks. Classic Chrome works best for soft Portra and Kodachrome styles, while Nostalgic Negative delivers rich amber seventies shadows. For vibrant Kodak Ektachrome slide colors outdoors, Velvia paired with DR400 creates deep blues and punchy greens.
3. Can I Get the Kodak Portra 400 Look in JPEG?
Yes, you can get a convincing Portra look straight out of camera without opening desktop editing software afterward. Load Portra Sol Chrome on X-Trans IV cameras or Quiet Portra 170 and Kodak Softlight on X-Trans V bodies. You can also browse our complete Film Stock Library on the tools page to compare every Portra emulation.
4. Do Kodak Film Recipes Affect My RAW Files?
No, Fujifilm film simulation recipes only bake into the JPEG file generated by your camera image processor. Your underlying RAF raw file keeps unprocessed sensor data along with a tag noting which simulation you used. Shooting RAW plus JPEG gives you a finished Kodak JPEG immediately plus a neutral raw backup for later.
5. Why Do X100V Kodak Recipes Look Different?
An X100V recipe often looks slightly different on an X100VI or X-T5 because the sensor generation changed. X-Trans V cameras render deeper blues in Classic Chrome, Classic Negative, and Eterna while offering higher forty-megapixel resolution. Paste any fourth-generation Kodak recipe into our Fujifilm Recipe Converter to adjust Color Chrome FX Blue automatically.
6. What White Balance Shift Gives Kodak Warmth?
Moving Red toward positive numbers and Blue toward negative numbers creates the warm golden bias associated with Kodak. For example, Portra Sol Chrome uses R+2 and B-6, while Quiet Portra 170 uses Daylight with R+4 and B-5. You can drag the dot on our WB Shift Visualizer to preview these exact shifts before shooting.
7. Why Will My White Balance Shift Not Save?
On older cameras like the X-T3, original X-T30, X-T2, and X100F, white balance shifts save globally per preset. If two custom slots share Auto white balance on those bodies, changing the shift in one changes both. Assign each Kodak recipe a different base preset like Auto, Daylight, Shade, or Custom Kelvin as a workaround.
8. Are Kodak Film Recipes Good for Studio Flash?
Most warm Kodak recipes are tuned for natural outdoor daylight, golden hour sun, or soft window light indoors. Under controlled studio strobes, strong Red and Blue white balance shifts and negative clarity can make skin unnatural. For studio portraits, switch to a cleaner PRO Negative Standard setup or check our complete simulation guide first.