Fujifilm Recipes vs Lightroom Presets: Which Wins for You?
Compare Fujifilm recipes vs Lightroom presets for speed, color, and cost, plus learn when in-camera Fuji recipes beat desktop Fujifilm JPEG editing now.
Weighing Fujifilm recipes vs Lightroom presets is one of the biggest workflow decisions every Fujifilm photographer faces. Both approaches promise classic analog color, yet they work at completely opposite stages of your creative process. In-camera Fuji recipes bake film simulations, white balance shifts, and organic grain directly into your JPEG at capture.
Desktop Lightroom presets apply tonal sliders and color grading curves to your files after the shoot ends. Understanding how both methods handle color science and Fujifilm JPEG editing saves you hours behind a computer. This practical comparison tests speed, cost, highlight recovery, and real shooting scenarios so you pick the right tool.
Fujifilm Recipes vs Lightroom Presets: Quick Scorecard Now
Comparing Fujifilm recipes vs Lightroom presets starts with seeing where each method actually processes your sensor data. A recipe shapes your photo inside the camera processor before saving, while a preset edits files later.
Here is the head-to-head scorecard comparing in-camera Fuji recipes against desktop and mobile Lightroom presets:
| Comparison Factor | In-Camera Fuji Recipes | Desktop & Mobile Lightroom Presets | Practical Winner |
| When It Applies | Before shutter click inside X-Processor | After import inside editing software | Fuji recipes for instant results |
| Primary File Target | Camera-processed Fine JPEG (plus untouched RAW) | Uncompressed RAF raw file (or light JPEG tweak) | Tie based on shoot latitude |
| Hardware Color Science | Uses genuine Color Chrome FX, Clarity, and Grain | Uses Adobe approximations ignoring camera Chrome FX | Fuji recipes for authentic Fuji tone |
| Live Viewfinder Preview | Shows exact finished look in EVF and LCD | Shows standard preview until computer import | Fuji recipes for field composition |
| Post-Shoot Time Cost | Zero minutes—files are ready to share immediately | Thirty to ninety minutes culling and grading | Fuji recipes for everyday life |
| Exposure Recovery Margin | Limited to baked 8-bit JPEG highlight headroom | Full 14-bit raw highlight and shadow recovery | Lightroom presets for tricky light |
| Total Financial Cost | Completely free inside camera custom slots | Monthly software fee plus paid preset packs | Fuji recipes for zero cost |
- In-camera Fuji recipes win whenever you want finished photos on your phone the moment you stop shooting.
- Desktop Lightroom presets win when unpredictable event lighting forces heavy highlight or white balance rescue later.
- Capturing RAW plus JPEG lets you use your camera recipe first and save presets for emergency rescues.
Browse our library of tested Fuji recipes right now to load free analog looks directly into your camera.
How In-Camera Fuji Recipes Shape Color Before You Shoot It?
When you load Fuji recipes into custom slots C1 through C7, your camera becomes a darkroom. Every time you press the shutter, the internal X-Processor builds a finished JPEG using proprietary color tables.
Here are the four in-camera advantages that desktop Lightroom presets simply cannot replicate during capture:
- Real-Time EVF and LCD Visual Feedback
Shooting with an active recipe displays your exact warm shifts, shadow curves, and monochrome filters inside your viewfinder. Seeing that finished mood in real time changes how you frame shadows, sunlit walls, and street silhouettes. Instead of hoping a flat file looks good tomorrow, you compose around the final color palette immediately.
- Proprietary Color Chrome and FX Blue Depth
Fujifilm processors apply Color Chrome Effect and Color Chrome FX Blue directly to saturated red, green, and blue channels. Those hardware routines deepen tonal gradation inside bright flowers and summer skies without dropping overall exposure. Because Adobe software ignores those proprietary tags on raw files, presets often struggle to match that depth.
- Sensor-Matched Organic Film Grain Structure
In-camera Grain Effect generates randomized silver-halide texture across highlights and midtones rather than laying down a flat overlay. You can pair Weak or Strong roughness with Small or Large grain sizes across modern Fujifilm bodies. Combined with Noise Reduction at minus four, camera JPEGs preserve crisp, filmic micro-contrast without plastic skin smoothing.
Portra Sol Chrome renders warm highlights and deep sky gradation directly inside the camera without touching desktop presets.
Read our straight out of camera guide and our complete film simulation guide to see how hardware color works.
Why Lightroom Presets Struggle to Match True Fujifilm Tone?
Many photographers buy expensive Lightroom presets expecting instant analog magic, only to find their Fujifilm files look strange. Three technical hurdles explain why third-party desktop presets rarely match the character of in-camera Fuji recipes.
Here is what actually happens when you import a Fujifilm raw file and click a preset:
- Adobe strips in-camera recipe parameters the moment Lightroom switches your imported file to Adobe Color.
- White balance shifts disappear or translate awkwardly into Kelvin and Tint sliders that miss Fujifilm’s diagonal grid.
- Color Chrome and Clarity reset to zero because Lightroom cannot decode proprietary X-Processor JPEG instructions.
- Camera Matching profiles are approximations built by Adobe rather than authentic processing from your camera hardware engine.
- Classic Negative and Nostalgic Negative often lose their signature warm-cool shadow separation inside desktop raw converters.
- X-Trans demosaicing artifacts can appear as worm-like textures when presets push sharpening and detail sliders too hard.
- Generic multi-brand preset packs are tuned for Sony or Canon sensors, pushing Fujifilm skin tones overly orange.
Check our White Balance Shift guide and our DR400 vs DR200 guide to see what camera settings presets miss.
When Desktop Lightroom Presets Still Earn Their Place Well
Being honest about Fujifilm recipes vs Lightroom presets means recognizing where desktop raw editing still wins. Certain high-stakes assignments demand post-capture flexibility that an 8-bit camera JPEG cannot provide on its own.
Here are the five specific shooting situations where applying Lightroom presets to raw files makes sense:
- Unpredictable wedding receptions with mixed tungsten, DJ lasers, and candlelit tables require post-capture white balance rescue.
- Extreme backlit landscapes spanning more than twelve stops of dynamic range need raw shadow and highlight sliders.
- Multi-brand camera shoots where a Fujifilm second body must match a Canon or Sony primary camera require presets.
- Batch client deliveries needing identical skin luminance across five hundred frames benefit from synchronized desktop preset grading.
- Local masking and retouching like radial gradients, sky masks, and blemish removal still require a dedicated editor.
Want finished colors without buying preset packs? Explore our verified Fujifilm recipe collection filtered by mood and camera.
Six Tested Fuji Recipes That Replace Paid Preset Styles Now
You don’t always need another Lightroom preset pack to get the look you’re after. These six FujiPic recipes offer in-camera alternatives to popular preset styles, from warm portrait colours to nostalgic film tones and gritty black and white. Choose a look that suits your photography, then check its settings and camera compatibility before saving it to your custom slots.
- Warm Portrait Colours: Portra Sol Chrome

If you like the warm, polished appearance of Portra-inspired lifestyle presets, start with Portra Sol Chrome. Built around Classic Chrome, this recipe combines DR400 with an R+2, B-6 white balance shift for warm highlights and deeper sky gradation.
Base simulation: Classic Chrome
Compatibility: X-Trans IV and GFX
Explore: Try the Portra Sol Chrome recipe.
- Clean Portrait Tones: Expired Reala Warmth
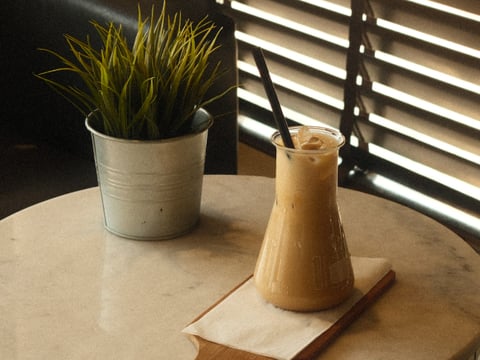
For photographers who prefer clean portrait colours with a subtle film-inspired texture, Expired Reala Warmth is worth exploring. It uses Reala Ace as its base simulation and adds Large grain for a more textured finish.
Base simulation: Reala Ace
Compatibility: X-Trans V and GFX
Explore: Try the Expired Reala Warmth recipe.
- Golden-Hour Street Colours: Vintage Amber
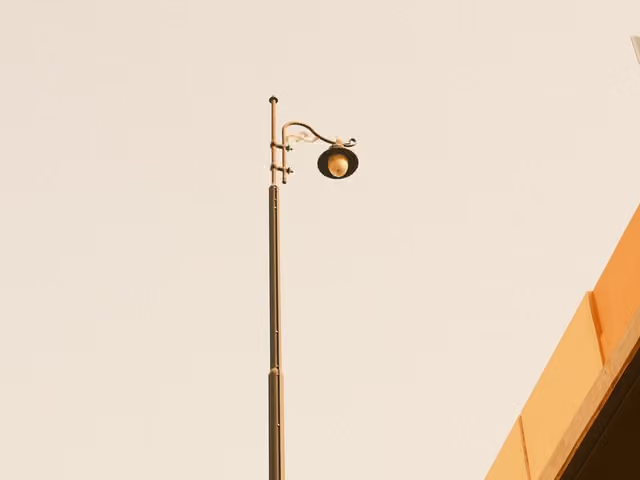
Vintage Amber is a good option for photographers drawn to warm sunset colours and nostalgic street photography. Its Classic Negative base, Color +4 and Clarity -3 settings help create a warmer, softer visual character.
Base simulation: Classic Negative
Compatibility: X-Trans V and GFX
Explore: Try the Vintage Amber recipe.
- Nostalgic Film Tones: Amarillo Negative
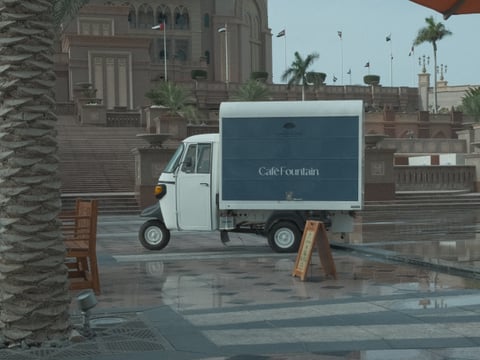
If you enjoy the warm, aged appearance of seventies-inspired film presets, take a look at Amarillo Negative. Based on Nostalgic Negative, it is designed around amber-toned shadows and a nostalgic colour palette.
Base simulation: Nostalgic Negative
Compatibility: X-Trans V and GFX
Explore: Try the Amarillo Negative recipe.
- Soft Pastel Colours: Astia Reverie
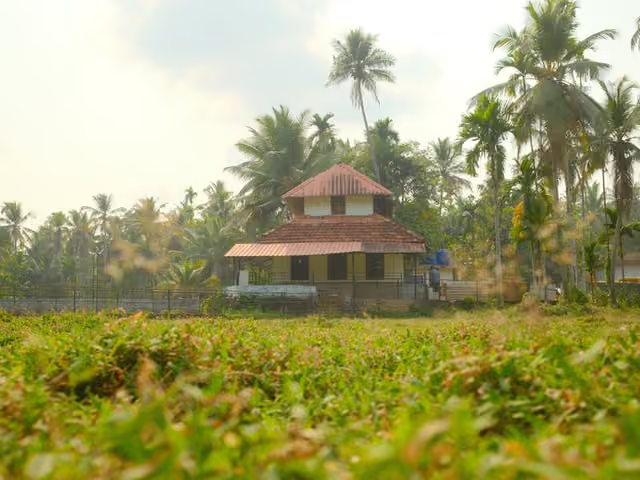
For overcast days and softer outdoor scenes, Astia Reverie offers a gentler approach to colour and contrast. Its Astia/Soft foundation gives photographers another option when they want a restrained look without heavily editing their JPEGs.
Base simulation: Astia / Soft
Compatibility: X-Trans IV, X-Trans V and GFX
Explore: Try the Astia Reverie recipe.
- Gritty Documentary Black and White: Deep Acros Mono
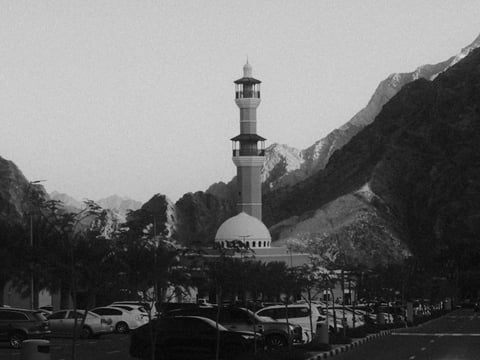
Photographers who prefer monochrome documentary images can try Deep Acros Mono. It uses Acros with the Yellow filter to create a distinct black-and-white look while retaining Fujifilm’s grain controls.
Base simulation: Acros + Ye Filter
Compatibility: X-Trans III, X-Trans IV, X-Trans V and GFX
Explore: Try the Deep Acros Mono recipe.
Smart Fujifilm JPEG Editing: Simple Tweaks Without Presets
Using in-camera recipes does not mean you are banned from ever touching a crop tool or brightness slider. Smart Fujifilm JPEG editing means keeping your camera’s baked color intact while making tiny ten-second finishing adjustments.
Here is how to apply light Fujifilm JPEG editing when a recipe frame needs a tiny nudge:
Rule 1: Straighten, Crop, and Nudge Exposure
Because your recipe already baked the Film Simulation, white balance shift, and grain, never slap a preset on top. Stacking a Lightroom preset onto a recipe JPEG double-bakes contrast curves and causes ugly color banding in skies. Instead, limit your phone or desktop tweak to straightening horizons and nudging exposure by a quarter stop.
Rule 2: Protect Baked Highlight Roll-Off
When a recipe uses DR400 with Highlight at minus two, bright clouds already hold smooth, compressed tonal gradations. Pulling the Lightroom Highlights slider down further on an 8-bit JPEG turns white clouds dull and muddy grey. If a frame feels slightly dark, lift the Shadows or Midtones gently by plus ten without touching Highlights.
Rule 3: Leave White Balance Sliders Alone
Aggressive white balance shifts on an 8-bit JPEG break the delicate warm-cool separation created by Classic Negative. If your recipe looked slightly too warm indoors, reduce Vibrance by minus five rather than dragging Tint sliders. For next time, test the shift beforehand on our free WB Shift Visualizer so your camera nails it.
How X RAW Studio Bridges Fuji Recipes With Desktop Editing?
What if you love the authentic look of in-camera FujiFilm recipes but want to choose your recipe after shooting? Fujifilm’s free X RAW Studio software gives you the exact middle ground between recipes and Lightroom presets.
Here is how X RAW Studio beats standard Lightroom presets when re-rendering your Fujifilm raw files:
- Hardware processor rendering routes your RAF raw file through your USB-connected camera’s actual X-Processor engine.
- Zero Adobe approximations means Classic Negative, Nostalgic Negative, Reala Ace, and Color Chrome FX render 100 percent authentically.
- Post-capture recipe swapping lets you test five different FujiPic recipes on the exact same shot after coming home.
- Batch recipe export lets you apply one saved camera profile across an entire folder of raw files cleanly.
- Cross-sensor recipe translation on our free Fujifilm Recipe Converter lets you adapt settings for your connected camera body.
Whether applied at capture or through X RAW Studio, Fujifilm processor recipes preserve authentic color separation and grain.
Have a favorite preset look you want in-camera? Upload a sample photo to our free Fujifilm Recipe Finder now.
Interactive Quiz: Should You Use Recipes, Presets, or Both
Most photographers do not need to pick one camp forever when deciding between Fujifilm recipes vs Lightroom presets. Matching your workflow to how you actually shoot prevents you from buying preset packs you will never open.
Here are the four shooter profiles to help you choose your ideal workflow in thirty seconds:
- Profile A: The Everyday, Street, and Travel Shooter who wants finished photos on their phone before dinner.
- Your best workflow is 100 percent in-camera Fujifilm recipes saved across your C1 through C7 custom slots.
- Why it fits you is that you spend your evenings enjoying your trip instead of staring at histograms.
- Profile B: The Hybrid Weekend and Family Photographer who wants instant JPEGs plus a safety net.
- Your best workflow is shooting RAW plus Fine JPEG with a trusted recipe active on Slot 1.
- Why it fits you is that 95 percent of your JPEGs need zero work while raw backups stay safe.
- Profile C: The Commercial and Event Professional who regularly shoots paid weddings or multi-camera brand client campaigns.
- Your best workflow is shooting RAW+JPEG using a clean recipe like Pro 160 Print for instant client previews.
- Profile D: The Experimental Film Emulation Enthusiast who loves testing new looks on old raw files via X RAW Studio.
Explore our everyday travel recipes guide and our night photography recipes guide to fill your custom slots.
Five Workflow Mistakes When Mixing Fuji Recipes and Presets
Mixing in-camera recipes and desktop presets without a clear system often leads to ruined colors and wasted storage. Avoiding five common mistakes keeps your Fujifilm JPEG editing clean and protects your highlights on every shoot.
Here are the five mistakes that trip up photographers switching between Lightroom presets and camera recipes:
- Applying a RAW preset onto a recipe JPEG doubles up contrast and saturation, causing posterized skies and orange skin.
- Forgetting that DR400 underexposes RAW files by two stops surprises Lightroom users when raw files open looking dark.
- Using Lightroom’s Kelvin slider to copy a recipe’s R/B white balance shift misses Fujifilm’s forty-five-degree grid rotation.
- Leaving Clarity active during burst action adds a brief processing pause per JPEG when you only needed raw files.
- Buying generic preset packs instead of checking our free Film Stock Matcher wastes money on looks your camera already makes.
Start Creating Your Own Fujifilm Looks Without Paid Presets
Choosing between Fujifilm recipes and Lightroom presets comes down to how much control you want before and after taking a photograph. Start with a few looks from FujiPic’s Fujifilm recipe collection, then use the Fujifilm Recipe Finder to discover an in-camera match for a preset you already love. For a flexible workflow, shoot RAW + Fine JPEG to enjoy ready-to-share recipe photos while keeping your RAF files available for more demanding edits.
Skip another preset pack. Find your next favourite look in the FujiPic recipe collection.
Frequently Asked Questions
- What Separates Fuji Recipes From Presets?
A Fujifilm recipe is a saved group of in-camera settings that finishes your JPEG the moment you shoot. A Lightroom preset is a post-processing filter applied to raw or JPEG files later on a computer. Recipes require zero software or editing time, whereas presets require importing files into an editing app afterward.
- Can I Use Recipes and Presets Together?
Yes, many photographers use both by setting their camera to capture RAW plus Fine JPEG on every shot. Your camera applies your chosen Fuji recipe to the JPEG while keeping the RAF raw file completely neutral. Never apply a full RAW preset directly onto an already-styled recipe JPEG, as that double-bakes the contrast.
- Why Do My RAW Files Lose My Recipe in LR?
When you import a RAF file into Lightroom, Adobe defaults to its own standard color rendering profile. Adobe software cannot read Fujifilm’s proprietary in-camera recipe parameters like Color Chrome FX Blue, Clarity, or WB shift. If you want your exact recipe look without re-editing, use the camera JPEG or open X RAW Studio.
- Are In-Camera Fuji Recipes Really Free?
Yes, in-camera film simulation recipes use the settings already built into your Fujifilm X-Series or GFX camera. You can browse and copy dozens of tested recipes across fifteen cameras on our FujiPic recipes page free. Unlike desktop preset packs that cost fifty to two hundred dollars, camera recipes cost nothing to program.
- Is Fujifilm JPEG Editing Possible Afterward?
Yes, light Fujifilm JPEG editing works well for cropping, straightening horizons, and nudging exposure or shadows slightly. Because an 8-bit JPEG already has tone curves and white balance baked in, avoid extreme highlight or color shifts. Getting your exposure compensation right in the field ensures ninety percent of your JPEGs need zero editing.
- Why Do DR400 RAW Files Look Dark in Presets?
When a recipe uses DR200 or DR400, your camera underexposes sensor capture by one or two full stops. The camera processor automatically lifts the midtones and shadows when creating the JPEG, protecting bright sky highlights. When you open that same RAF file in Lightroom, you must boost exposure to match the bright JPEG.
- Do Lightroom Camera Profiles Match Fuji?
Lightroom’s Camera Matching profiles (like Camera Classic Chrome) are reverse-engineered approximations created by Adobe engineers. While they get close to the base simulation, they do not include Color Chrome effects or organic grain. For true Fujifilm color science, in-camera JPEGs or USB-tethered X RAW Studio always beat third-party profile approximations.
- How Do I Find a Recipe Matching My Preset?
If you already have a favorite Lightroom preset look, export one sample photo edited with that preset. Upload that reference image into our free Fujifilm Recipe Finder to get ranked in-camera recipe matches. Each matched recipe shows a percentage fit score and exact menu values for your specific Fujifilm sensor.