5 Best Fujifilm Recipes for Golden Hour and Sunset Photos
5 Fujifilm golden hour recipes with sunset settings, white balance, DR, exposure tips, and camera compatibility for warm JPEG photos.
Fujifilm golden hour recipes can look very different once the sun drops and the light becomes warmer, softer, and more directional. Catching warm skin tones under low sun works best when pairing a soft film simulation with shadow tweaks, rather than simply increasing warmth everywhere.
The five recipes below compare real settings and sensor compatibility, then show which white balance, exposure, and Fuji sunset settings help preserve that warmth naturally. Fujifilm’s own sunset guide recommends Daylight or Shade white balance instead of Auto, because Auto tries to neutralize the orange glow created by the setting sun.
The recipes are compared by sensor, so each setting has a clear compatibility point without assuming one recipe works across every camera. White balance and Dynamic Range choices explain how to retain color and highlight detail, followed by a simple
Best Fujifilm Golden Hour Recipes at a Glance
The five Fujifilm golden hour recipes to start with are Warm Amber, Vintage Amber, Marigold Afternoon, Kodak Softlight, and Portra Sol Chrome.
The right pick depends on the sensor generation, since FujiPic verifies different recipes across X-Trans III, IV, V, and GFX.
Here is the quickest match by camera family.
| Sensor family | Recipe to try first | Look |
| X-Trans III | Warm Amber | Amber warmth, stronger grain |
| X-Trans IV | Warm Amber, Marigold Afternoon, or Portra Sol Chrome | Warm amber, Classic Negative, or soft Classic Chrome |
| X-Trans V | Vintage Amber or Kodak Softlight | Saturated amber or softer Classic Chrome |
| GFX | Warm Amber, Vintage Amber, or Portra Sol Chrome | Verified warm recipes across compatible GFX bodies |
Moving between X-Trans IV and V becomes simpler with the Recipe Converter
What Makes a Good Fujifilm Golden Hour Recipe?
A strong golden hour recipe leans into amber and gold instead of correcting sunset light back toward neutral. Four settings usually determine whether Fujifilm warm recipes retain pleasing skin, sky detail, and color as light fades.
Here are the four settings to check in any recipe.
- White balance and shift: A warm bias works better than Auto, with Kelvin and R/B shift controlling how strongly that warmth appears.
- Dynamic Range: DR200 or DR400 can protect bright skies when the sun sits low and contrast increases.
- Highlight and Shadow: Softer highlights with controlled shadows help keep faces detailed without flattening the scene.
- Color and grain: Rich color with moderate grain keeps detail readable, while high ISO can make stronger grain more noticeable.
Fujifilm’s grid runs about 45 degrees from the Kelvin and tint controls, so warmer looks often require diagonal movement.
The WB Shift Visualizer makes those diagonal adjustments easier to understand before changing a recipe.
Check this first: Read the recipe’s Sensors and Cameras list before loading it, because compatibility varies between sensor generations.
5 Fujifilm Golden Hour Recipes Compared
These five Fujifilm golden hour recipes share a warm bias, but their film simulations, white balance, and contrast settings create different results. Every value below comes directly from FujiPic’s tested recipe pages, keeping the settings tied to verified recipes.
Here are the core settings side by side.

Film Simulation: PRO Neg. Std
Dynamic Range: DR400
White Balance: Custom 7100K, R+7 B-5
Highlight and Shadow: H0 S+3
Exposure Compensation: +1/3 to +1

Film Simulation: Classic Negative
Dynamic Range: DR400
White Balance: Fluorescent 1, R+1 B-6
Highlight and Shadow: H-1.5 S+2.5
Exposure Compensation: +2/3 to +1

Film Simulation: Classic Negative
Dynamic Range: DR400
White Balance: Custom 5500K, R+3 B-7
Highlight and Shadow: H-1 S-1
Exposure Compensation: 0 to +1
Compatibility: X-Trans IV, GFX
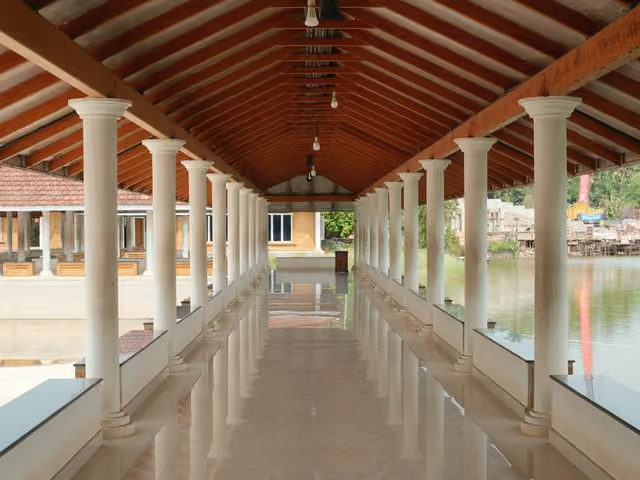
Film Simulation: Classic Chrome
Dynamic Range: DR400
White Balance: Auto White Priority, R+2 B-4
Highlight and Shadow: H-1.5 S-1
Exposure Compensation: 0 to +1
Compatibility: X-Trans V, GFX
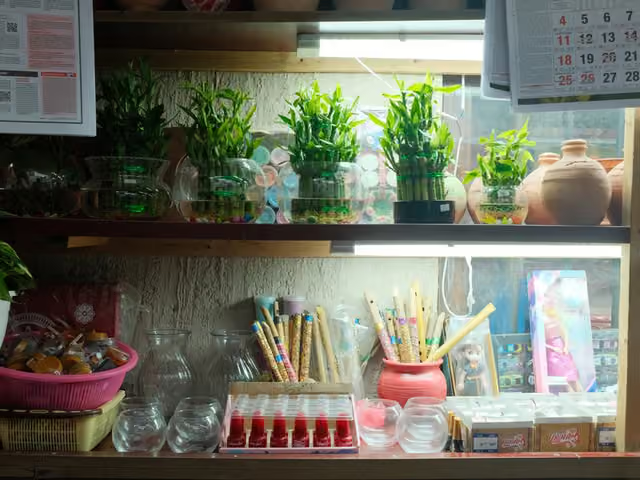
Film Simulation: Classic Chrome
Dynamic Range: DR400
White Balance: Auto, R+2 B-6
Highlight and Shadow: H-2 S-2
Exposure Compensation: +1/3 to +1 1/3
Note: Portra Sol Chrome uses Auto white balance, so switch to Daylight or Shade to keep more sunset color.
These Fuji sunset settings are starting points, with each recipe page providing the full settings list for loading and shooting.
Warm Negative Recipes for Sunset Color
For Fujifilm golden hour photography, negative-film-style bases can give sunsets rich amber color and softer highlights without forcing saturation.
The two recipes here suit different sensors, shooting situations, and levels of color intensity.
Here are the two recipes and where each one works.
Warm Amber (PRO Neg. Std)
- Best for: Portraits and studio warmth, especially when golden-hour light adds natural warmth and gentle contrast.
- Sensors: Designed for X-Trans III, X-Trans IV, and GFX sensors, with tested bodies listed on FujiPic.
- Look: PRO Neg. Std, DR400, Highlight 0, Shadow +3, Color -3, and Strong grain create restrained tones with deeper shadows.
- Watch out: Subdued tones can weaken vivid landscapes, while Strong grain appears at high ISO and the cool shift can affect blues.
Vintage Amber (Classic Negative)
- Best for: Warm city skylines, street scenes, and urban subjects photographed during golden hour or overcast conditions.
- Sensors: Designed for X-Trans V and GFX sensors, including tested Fujifilm bodies listed on the recipe page.
- Look: Classic Negative, DR400, Color +4, Clarity -3, and strong Color Chrome effects create vivid color with softened detail.
- Watch out: High saturation can change skin tones, while Strong grain becomes noticeable at higher ISO settings.
For complete settings and compatibility details, see the Warm Amber and Vintage Amber recipe pages.
Warm Fujifilm Recipes for Golden Hour Light
Warm Fujifilm recipes can handle fading sunlight differently, depending on their color balance, contrast, and shadow treatment.
These three options cover nostalgic street color, softer Classic Chrome rendering, and a warmer Portra-inspired finish.
Here are three options for low sun.
Marigold Afternoon (Classic Negative)
- Sensors: Designed for X-Trans IV and GFX sensors, with tested bodies including X-E4, X-Pro3, X-S10, X-T4, X100V, and GFX100S.
- Settings snapshot: Classic Negative, DR400, Highlight -1, Shadow -1, Color +1, Clarity -4, 5500K, R+3 B-7, with 0 to +1 exposure compensation.
- Best for: Street and urban scenes during golden hour, especially when vibrant colors and gentle highlights suit the scene.
- Watch out: The cool-blue shift can affect skin tones, and FujiPic does not recommend it for studio portraits.
Kodak Softlight (Classic Chrome)
- Sensors: Designed for X-Trans V and GFX sensors, with tested bodies including X-T5, X-H2, X-H2S, X100VI, and GFX100S II.
- Settings snapshot: Classic Chrome, DR400, Highlight -1.5, Shadow -1, Color +3, Clarity -2, Auto White Priority, R+2 B-4, with 0 to +1 exposure compensation.
- Best for: Street, travel, and everyday scenes where natural warmth, vivid color, and balanced highlights matter.
- Watch out: Warm color can show indoors, while higher ISO settings may reduce sharpness.
Portra Sol Chrome (Classic Chrome)
- Sensors: Designed for X-Trans IV and GFX sensors, with tested bodies including X-E4, X-Pro3, X-S10, X-T4, X100V, and GFX100S.
- Settings snapshot: Classic Chrome, DR400, Highlight -2, Shadow -2, Color +3, Auto WB, R+2 B-6, with +1/3 to +1 1/3 exposure compensation.
- Best for: Street, travel, daily life, cityscapes, and coastal views in warm golden-hour light.
- Watch out: Soft contrast can reduce detail, while muted blues may cool shadows in some scenes.
For the complete settings and compatibility details, visit Marigold Afternoon, Kodak Softlight, and Portra Sol Chrome.
Best White Balance for Fujifilm Golden Hour Photos
Use Daylight or Shade white balance instead of Auto for sunsets, according to Fujifilm’s own guidance. Auto can try to make the orange light look neutral, which removes part of the color that makes sunset scenes distinctive.
Here is how to set and refine it.
- Pick a preset
- Daylight: Keeps the natural gold from sunset light without adding another layer of warmth.
- Shade: Adds extra warmth when the scene needs a stronger golden bias.
- Lock it
- Keep the same white balance through the whole session so frames stay consistent as light changes.
- Manual consistency also makes Fuji sunset settings easier to compare across a sequence.
- Shift it
- Use the R and B grid to push warmer, especially when a preset still looks too neutral.
- Fujifilm’s grid sits roughly 45 degrees from Kelvin and tint controls, so warmer adjustments often move diagonally.
- Check the change with FujiPic’s WB Shift Visualizer, alongside Fujifilm White Balance Shift Explained.
Recipes such as Warm Amber layer their own shifts onto the selected preset, changing the final color further.
Fuji Sunset Settings: Exposure and Dynamic Range
Sunset scenes create huge brightness gaps between the sky, sun, and darker foreground.
DR, exposure compensation, and bracketing help manage that gap when shooting sunset JPEGs in changing light.
Here are the settings to adjust in order.
- Start with DR: DR200 and DR400 prioritize highlight protection, while DR100 keeps the lowest ISO floor.
- Remember the trade-off: DR200 raises minimum ISO by one stop, while DR400 raises it by two stops.
- Watch shutter speed: Higher minimum ISO can force faster shutter speeds, making a tripod useful when low sun needs slower exposures.
- Use exposure compensation: Lower exposure when bright clouds or the sun push important highlights toward clipping.
- Use bracketing: Fujifilm recommends shooting slightly brighter and darker frames when the sunset exposure is difficult to judge.
- Expose intentionally: A silhouette can deliberately clip foreground detail when the sky carries the important visual information.
- Check the histogram: DR400 cannot recover highlights that are already clipped, so exposure still matters.
| Situation | DR | Exposure move |
| Sun in frame | DR400 | Check the histogram and lower exposure if the sky clips |
| Sun behind clouds | DR200 | Keep highlights while holding color |
| Silhouette on purpose | DR100 | Expose for the sky |
| Bright sky over dark ground | DR200 or DR400 | Bracket exposures |
- FujiPic recipe range: Tested golden-hour recipes use exposure compensation from +1/3 to +1 1/3.
How to Make Any Fujifilm Recipe Golden Hour Ready?
Most Fujifilm warm recipes can be adapted for golden hour through four small changes to white balance, DR, exposure, and highlights.
Test each change on a real scene before saving the recipe, because sunset light can reveal differences daylight shooting hides.
Here are the steps in order.
- Change white balance: Switch from Auto to Daylight or Shade, following Fujifilm’s sunset guidance for preserving natural warmth.
- Add a warm shift: Move gradually toward red and away from blue, checking the recipe after each small adjustment.
- Raise Dynamic Range: Set DR200 or DR400 when the sun enters the frame, then check its higher minimum ISO.
- Adjust exposure compensation: Start between +1/3 and +1, then use the histogram to refine brightness for the scene.
- Soften clipped highlights: Lower highlights by one step when the sky clips, changing one setting at a time while testing.
Save it: Store the result in a Custom Setting slot, such as C1 to C7 on many bodies. The X-S10 supports C1 to C4, so save accordingly. For a reusable workflow, see FujiPic’s custom Fujifilm recipe guide, then refine the saved recipe after real-world testing.
Golden Hour Recipe Mistakes to Avoid
Most failed golden hour JPEGs usually come from white balance, exposure, or loading a recipe onto the wrong sensor generation.
Fujifilm golden hour recipes become easier to troubleshoot once each problem has a simple setting change attached.
Here are the four mistakes to avoid.
- Leaving white balance on Auto: Switch to Daylight or Shade when sunset color matters, because Auto can neutralize the orange glow.
- Overexposing the sky with the sun in frame: Check the histogram and lower exposure when highlights approach clipping, even when the foreground darkens.
- Loading a recipe made for a different sensor: Check compatibility first, because X-Trans V can render affected film simulations with deeper blue than X-Trans IV.
- Using strong grain recipes at very high ISO after light fades: Strong grain can become more noticeable at higher ISO, so reduce grain or choose another recipe.
Related: Use FujiPic’s Recipe Converter when moving recipes between X-Trans IV and X-Trans V, including Color Chrome FX Blue adjustments.
Set Up Your Sunset Look Before the Light Fades
Use a warm recipe with Daylight or Shade white balance, and DR200 or DR400 when the sun is in frame.
Sensor fit decides which recipe makes the most sense to load first, so check compatibility before heading outside.
Here is your next step before the next golden hour.
- Pick a recipe: Choose one matched to your sensor, then keep the settings ready before the light starts changing.
- Save the setup: Store the recipe in a Custom Setting slot so switching to sunset settings takes only seconds.
- Shoot a short bracket: Capture brighter and darker frames at DR200 and DR400, then compare the sky and foreground afterward.
Browse tested Fujifilm recipes, explore the site’s free tools, and join 4,200+ Fujifilm photographers receiving new recipes every week.
Frequently Asked Questions
- What is the best Fujifilm golden hour recipe?
The right recipe depends on your sensor, with Warm Amber suited to X-Trans III and IV, while Vintage Amber targets X-Trans V.
- What white balance should I use for golden hour on Fujifilm?
Use Daylight or Shade instead of Auto, because Fujifilm notes that Auto can neutralize the orange color of sunset light.
- What dynamic range is best for sunset photos?
Use DR200 or DR400 when the sun is in frame, while DR100 works when deliberately exposing for a silhouette.
- Which film simulation is best for sunset?
Classic Negative, PRO Neg. Std, and Classic Chrome all appear across these recipes, so test the available base against your scene.
- Do golden hour recipes work at sunrise?
Yes, the same recipes can work at sunrise because both sunrise and sunset provide warm, low-angle natural light.
- What exposure compensation should I use?
FujiPic’s tested recipes use exposure compensation from +1/3 to +1 1/3, while bracketing helps when changing light makes exposure uncertain.
- Will these recipes work on my camera?
Check the recipe’s sensor compatibility first, then use FujiPic’s Recipe Converter when adapting settings between X-Trans IV and X-Trans V.
- Should I shoot RAW or JPEG with a recipe?
Recipes affect the JPEG rendering, while shooting RAW+JPEG preserves the recipe-treated JPEG alongside the original RAW file for later processing.