How to Use Fujifilm Recipes Without Editing Any Photos Now
Master Fujifilm recipes without editing using our five-step Fujifilm recipes workflow, forgiving SOOC JPEG settings, and tested FujiPic camera recipes.
Shooting Fujifilm recipes without editing is the fastest way to fall back in love with everyday photography. Instead of coming home to five hundred unfinished files, a dialed-in Fujifilm no editing setup finishes every frame live. Getting reliable SOOC JPEG results requires more than just copying random numbers from social media into your menu.
You need a repeatable Fujifilm recipes workflow that aligns custom slots, exposure metering, and white balance before shooting. When your camera settings match the light outside, your photos move straight from SD card to phone. This field playbook walks you through the five-stage workflow and the most forgiving recipes for zero post-processing.
Why Most Attempts at Fujifilm No Editing Fail in the Field?
Many photographers try shooting Fujifilm recipes without editing once, get an orange or muddy photo, and quit. Almost every failed Fujifilm no editing attempt comes from four fixable pre-shutter habits rather than bad camera recipes.
Here are the four field habits that force photographers back into an editing app and how to fix them:
- Shooting a single recipe all day ignores how noon sunlight, indoor tungsten bulbs, and blue twilight shift color.
- Relying on Multi metering blindly lets bright sky backgrounds trick your camera into underexposing faces into dark shadows.
- Leaving Auto White Balance unconstrained allows green tree canopies or colored walls to neutralizing your recipe’s warm cast.
- Forgetting highlight alert blinkies in your viewfinder leads to clipped white foreheads that no 8-bit file recovers.
- Choosing extreme specialist recipes instead of forgiving everyday setups from our FujiPic recipes catalog narrows your margin.
Start with forgiving, field-tested looks from our verified Fujifilm recipes library filtered for your exact camera body.
The Five-Stage Fujifilm Recipes Workflow From Lens to Phone
A true zero-edit lifestyle relies on a five-stage Fujifilm recipes workflow that happens before and during capture. Following this sequence guarantees every SOOC JPEG lands on your smartphone ready to share, print, or archive.
Here are the five stages that take your photograph from street corner to finished image with zero editing:
Stage 1: Map Custom Slots by Lighting Condition
Instead of naming custom slots after obscure film stocks, organize C1 through C4 around the light in front of you. Assign C1 to bright daylight, C2 to warm golden hour, C3 to overcast or indoor light, and C4 to Acros. When you step out of a sunny street into a dim café, one Q-menu tap adapts your color immediately.
Stage 2: Lock White Balance and Dynamic Range
Before raising your camera to your eye, verify that your recipe’s Dynamic Range and White Balance mode match the sky. Use DR400 under harsh midday sun to protect two extra stops of highlight detail inside bright clouds. Check your Red and Blue coordinate shift using our free WB Shift Visualizer so skin tones stay clean.
Stage 3: Ride the Exposure Compensation Dial
In a zero-edit workflow, your physical exposure compensation dial replaces the brightness slider inside an editing program. Nudge exposure plus one-third or plus two-thirds of a stop when shooting warm negative recipes in open shade. Pull exposure minus one-third of a stop whenever bright sunlight hits white clothing or reflective water surfaces.
Stage 4: Frame Cropping Tightly Inside the EVF
Because you want to skip post-capture cropping, use your electronic viewfinder grid lines to level horizons before pressing the shutter. Turn Natural Live View Off in your screen settings so your viewfinder displays the exact recipe contrast and color. Stepping two paces closer or switching your in-camera aspect ratio to 3:2 or 1:1 finishes composition at capture.
Stage 5: Transfer Select Frames via Wireless App
Instead of dumping four hundred shots onto a laptop, press the playback rating button on your five best frames. Send only those starred SOOC JPEG files over Bluetooth and Wi-Fi to your phone while riding the train home. Your favorite memories are backed up and shared before you even walk through your front door.
Read our beginner recipe guide and our custom recipe building guide to set up your custom slots.
Seven Most Forgiving Recipes for Zero-Edit Everyday Shoots
Not every Fujifilm recipe works equally well across changing light. Some are designed for specific conditions, while others offer more flexibility for everyday photography. Here are seven FujiPic recipes worth trying when you want finished JPEGs without spending time in an editing app.
1. Quiet Portra 170: For Everyday Daylight and Golden Hour
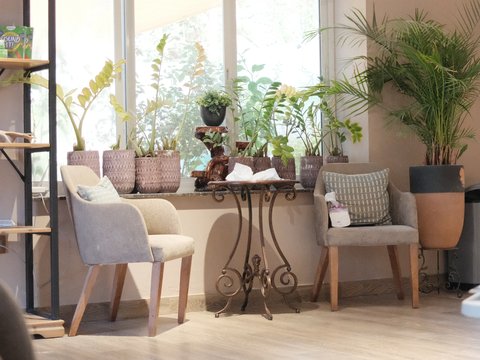
Quiet Portra 170 is a good starting point for photographers who want a relaxed, film-inspired look throughout the day. Its Classic Chrome foundation, 0/0 tone curves, and DR Priority Auto help maintain a forgiving tonal balance.
Best for: Sunny daylight and golden-hour walks.
Base simulation: Classic Chrome
Camera compatibility: X-Trans V and GFX
Explore the Quiet Portra 170 Fujifilm recipe.
2. Kodak Softlight: For Cafés, Street Photography, and Mixed Shade

Kodak Softlight is suited to everyday shooting where lighting conditions can change quickly. Auto White Priority and DR400 help manage the warm colour casts often encountered when moving between indoor and outdoor environments.
Best for: Daily cafés, street walks, and mixed shade.
Base simulation: Classic Chrome
Camera compatibility: X-Trans V and GFX
Explore the Kodak Softlight Fujifilm recipe.
3. Portra Sol Chrome: For Bright Travel Photography

Bright sunlight can create harsh contrast, especially around beaches, markets, and coastal landscapes. Portra Sol Chrome uses Classic Chrome with Highlight -2 and Shadow -2 to produce a softer tonal treatment.
Best for: Bright travel scenes, coastal views, and markets.
Base simulation: Classic Chrome
Camera compatibility: X-Trans IV and GFX
Explore the Portra Sol Chrome Fujifilm recipe.
4. Expired Reala Warmth: For Natural-Looking Portraits
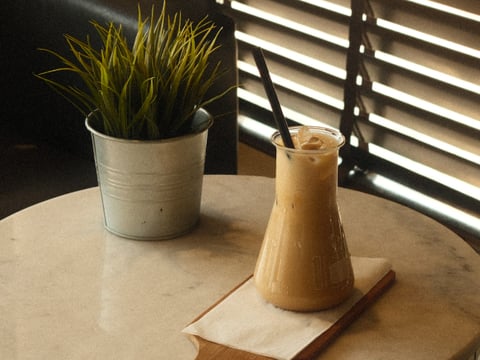
For relaxed portraits and afternoon walks, Expired Reala Warmth offers a softer colour approach. Its Reala Ace foundation, Color -2, and 6700K white balance setting are designed to keep portrait colours calm and natural.
Best for: Relaxed portraits and afternoon walks.
Base simulation: Reala Ace
Camera compatibility: X-Trans V and GFX
Explore the Expired Reala Warmth Fujifilm recipe.
5. Astia Reverie: For Overcast Days and Family Photography

Flat lighting can make outdoor photographs look dull and lifeless. Astia Reverie offers a gentler approach, combining its Astia/Soft foundation with shadow adjustments and DR400 for softer-looking scenes.
Best for: Overcast days, gardens, and family sessions.
Base simulation: Astia / Soft
Camera compatibility: X-Trans IV, X-Trans V, and GFX
Explore the Astia Reverie Fujifilm recipe.
6. Softened Daylight: For Cloudy Weather and Window Light

Softened Daylight is designed for scenes where diffused lighting makes colours and contrast appear flat. Its PRO Neg. Std foundation, DR200, and Clarity -3 settings offer a gentler rendering of cloudy skies and window-lit scenes.
Best for: Cloudy weather and diffused window light.
Base simulation: PRO Neg. Std
Camera compatibility: X-Trans IV and X-Trans V, and GFX
Explore the softened Daylight recipe
7. Deep Acros Mono: For Black-and-White Street Photography
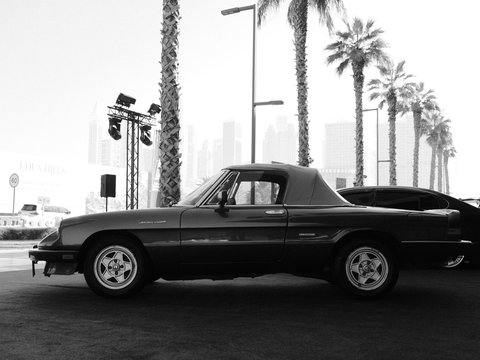
When coloured lighting becomes distracting, switching to monochrome can simplify the entire scene. Deep Acros Mono uses Acros with the Yellow filter to create a distinct black-and-white look, making it a useful option for architecture and documentary photography.
Best for: Harsh midday sun, architecture, and street photography.
Base simulation: Acros + Ye Filter
Camera compatibility: X-Trans III, X-Trans IV, X-Trans V, and GFX
Explore the Deep Acros Mono Fujifilm recipe.
Forgiving recipes with softened highlights and DR400 let you shoot straight into warm afternoon sun without post-processing.
Filter all ninety-one tested looks by your exact camera body on our Fujifilm Recipes page right now.
Pre-Shutter Camera Setup for Clean SOOC JPEG Files All Day
Even the best recipe fails if your underlying camera metering, autofocus, and screen settings fight against your JPEG. Configuring six one-time body settings ensures your viewfinder preview matches the saved file on your memory card.
Here is the six-point pre-shutter setup checklist for a dependable Fujifilm no editing camera configuration:
- Turn Natural Live View Off inside Screen Set-Up so your EVF displays your active recipe tone and color.
- Enable Preview Exp./WB in Manual Mode so exposure shifts and white balance tweaks appear live before shooting.
- Activate Highlight Alert blinkies in Display Custom Setting to warn you immediately when bright clouds risk clipping.
- Set Photometry to Multi or Center-Weighted when using Face/Eye Detection so your camera exposes for your subject’s skin.
- Link Spot Metering to Focus Area when shooting high-contrast street silhouettes where only the lit subject matters.
- Configure three Auto ISO banks with minimum shutter speeds matched to your focal length (such as 1/125s).
- Set Image Quality to Fine JPEG (or RAW+Fine on dual-card bodies) with Color Space locked to sRGB for web sharing.
Check our DR400 vs DR200 guide and our White Balance Shift guide to dial in exposure and color.
How to Handle Tricky Mixed Light Without Opening an Editor?
Bright sunny mornings are easy for any camera, but mixed indoor bulbs, rainy clouds, and night neon test your workflow. Knowing which custom slot to switch to keeps your Fujifilm recipes without editing workflow intact across ugly lighting.
Here is how to handle four challenging real-world lighting environments right inside your camera menu:
Mixed Café Windows and Warm Tungsten Bulbs
When blue daylight from a window collides with orange ceiling lamps, fixed Kelvin recipes often turn skin blotchy. Switch to a recipe using Auto White Priority like Kodak Softlight so your camera tames extreme tungsten warmth. Alternatively, flip one dial over to Deep Acros Mono and turn conflicting color temperatures into classic monochrome contrast.
Flat Overcast Skies and Rainy Afternoon Walks
Heavy cloud cover removes directional shadows and shifts ambient light cooler, making sunny daylight recipes look washed out. Load a dedicated overcast recipe like Softened Daylight, Astia Reverie, Bleached City Tone, or Muted Halo Stock. Dropping Clarity to minus three or minus five adds a gentle atmospheric glow to wet streets and umbrellas.
Harsh Midday Sun and Bright Coastal Glare
Overhead noon sunlight creates deep eye-socket shadows and threatens to blow out white shirts and sandy beaches. Switch to Portra Sol Chrome or Pro 160 Print where DR400 and negative highlight curves compress harsh contrast. Watch your viewfinder blinkies and dial in minus one-third EV whenever reflective water or white walls fill the frame.
Neon City Streets and After-Dark Walks
Night street scenes combine pitch-black shadows with intense neon signs that clip red and blue channels easily. Load Warm Night on Classic Negative or Night Reversal on Velvia and meter directly for the bright neon sign. Let dark alleys fall naturally into deep shadow rather than boosting exposure and introducing muddy high-ISO noise.
Organizing Your C1-C7 Custom Slots for Zero-Edit Versatility
Having ninety-one recipes on our website helps only when the right four to seven looks sit inside your camera. Structuring your custom slots by lighting scenario turns your Q menu or Film Dial into an instant toolkit.
Here is our recommended 7-slot zero-edit setup for C1-C7 bodies (and how to trim it for C1-C4 cameras):
- Slot C1 (Everyday Daylight All-Rounder): Load Expired Reala Warmth or Kodak Softlight for 80 percent of daytime walks.
- Slot C2 (Harsh Midday & Travel Sun): Load Portra Sol Chrome or Quiet Portra 170 with DR400 highlight protection.
- Slot C3 (Golden Hour & Sunset Glow): Load Vintage Amber, Marigold Afternoon, or Amarillo Negative for warm late light.
- Slot C4 (Documentary Black & White): Load Deep Acros Mono or High Contrast Roll for timeless monochrome frames.
- Slot C5 (Overcast & Rainy Weather): Load Astia Reverie or Softened Daylight when clouds flatten outdoor contrast.
- Slot C6 (Indoor & Warm Practical Lamps): Load Film Reel Gold or Eterna Projection for cafés and living rooms.
- Slot C7 (Night Neon & City Lights): Load Warm Night or Midnight Filament for evening urban walks.
Organizing your C1 through C7 custom slots by lighting condition lets you adapt to any scene in two seconds.
Not sure which slots your camera has? Check our Fujifilm cameras directory and sensors hub now.
Using In-Camera RAW Conversion to Fix Mistakes Without Apps
What happens if you accidentally shot a sunset portrait on your monochrome C4 slot or missed white balance? When you shoot RAW plus Fine JPEG, your camera’s built-in Playback RAW Conversion menu rescues the shot without a computer.
Here is how to re-bake a missed shot right on your camera screen in twenty seconds:
- Press the Playback button and hit the Menu/OK button on any photo captured in RAW or RAW+JPEG mode.
- Select RAW Conversion from the playback menu to re-process that exact frame through the camera’s internal X-Processor.
- Swap the Film Simulation or tweak Push/Pull exposure by up to one stop while previewing the change on-screen.
- Adjust White Balance Shift or Highlight/Shadow tone if harsh lighting made your original recipe look slightly too contrasty.
- Press the Q button to save a brand-new, 100 percent authentic camera JPEG directly onto your SD card.
Start Shooting Fujifilm Without Editing Every Photo
Getting beautiful SOOC JPEGs isn’t about finding one perfect recipe; it’s about matching your camera settings to the light and scenes you photograph. Start with three or four looks from our Fujifilm recipes collection, organise them into your custom slots, and use the Fujifilm Tools library to fine-tune your settings. Once you get comfortable with this workflow, you can spend less time editing and more time enjoying photography.
Your next great JPEG starts in the camera, not Lightroom. Explore 91 tested Fujifilm recipes and find your next favourite look.
Frequently Asked Questions
1. Can I Really Shoot Fujifilm Without Editing?
Yes, Fujifilm cameras are famous for producing publication-ready SOOC JPEG files when paired with lighting-matched custom recipes. By combining Film Simulations, Dynamic Range, tone curves, and white balance shifts, your camera grades the photo live. Browse our FujiPic recipes collection to load tested settings that need zero computer work afterward.
2. Which Recipe Is Most Forgiving for Beginners?
Recipes built on Classic Chrome, Astia, or Reala Ace with soft highlight curves are the most forgiving. Load Kodak Softlight, Quiet Portra 170, or Expired Reala Warmth on fifth-generation bodies, or Portra Sol Chrome on fourth-generation cameras. You can also use our free Film Simulation Picker to find a safe everyday starting point.
3. Why Do My Unedited Recipe Photos Look Orange?
An overly orange photo usually happens when you shoot a warm daylight recipe indoors under tungsten light bulbs. Many golden-hour recipes push Red positive and Blue negative on top of a fixed Kelvin or Daylight preset. When moving indoors, switch to a slot using Auto White Priority or test shifts on our WB Shift Visualizer.
4. How Do I Avoid Blown Highlights in SOOC JPEGs?
Set Dynamic Range to DR200 or DR400 and lower your Highlight Tone setting between minus one and minus two. Turn on Highlight Alert blinkies inside your viewfinder so flashing areas warn you before you press the shutter. When shooting bright clouds or white clothing, turn your exposure compensation dial down by one-third stop.
5. Are Unedited Fujifilm JPEGs Good for Printing?
Yes, a well-exposed Fine JPEG from a 26MP or 40MP Fujifilm sensor prints beautifully at large wall sizes. Make sure you select L Fine (Large Fine) in your Image Quality menu so JPEG compression stays minimal. The subtle organic grain from your recipe actually adds pleasant analog texture on matte and luster photo papers.
6. How Do I Fix a Shot If I Used the Wrong Slot?
If you shoot in RAW plus Fine JPEG mode, you can fix any wrong-recipe shot right inside the camera. Open the photo in Playback, press Menu/OK, select RAW Conversion, and switch to your desired custom slot settings. Your camera will generate a fresh SOOC JPEG in two seconds ready to transfer to your phone.
7. How Many Recipes Do I Need for Travel Trips?
You only need three or four well-chosen recipes to cover an entire vacation without ever touching a laptop. Pack one versatile daylight recipe, one warm golden-hour recipe, one overcast/indoor recipe, and one Acros monochrome setup. Read our everyday travel recipes guide and our golden hour recipes guide for curated travel packs.
8. Does Transferring to My Phone Lower Quality?
By default, the Fujifilm XApp compresses images to three megapixels for faster wireless transfers unless you change one toggle. Open the app settings and turn off Resize Image for Smartphone so full-resolution Fine JPEGs transfer intact. Full-size transfers take only a couple extra seconds and preserve every bit of your recipe detail and grain.