Fujifilm DR400 vs DR200: Which Setting Is Best for You?
Fujifilm DR400 vs DR200 explained: See what each Dynamic Range setting does, the ISO it needs, and which one suits your photos.
Fujifilm DR400 vs DR200 is one of those settings you probably tried once, then wondered which one you were actually supposed to use. Both can help when the light gets tricky, but they handle highlights and shadows differently, and choosing the wrong one can leave you with a blown-out sky or noisier shadows.
The good news? DR200 gives you one extra stop of highlight protection, while DR400 gives you two, but both come with a higher minimum ISO. They also change how the RAW file is exposed, while the tone curve affects the JPEG, so there’s more going on than just a different-looking preview.
Fujifilm DR200 vs DR400 at a Glance
DR200 suits most daylight shooting, while DR400 is useful when bright highlights are genuinely at risk. Both settings underexpose the sensor and raise the minimum ISO, trading some shadow noise for extra highlight protection.
Here is the side-by-side view.
| Feature | DR200 | DR400 |
| Highlight headroom | About 1 stop | About 2 stops |
| Underexposure | 1 stop | 2 stops |
| Minimum ISO on a base ISO 160 body | ISO 320 | ISO 640 |
| Shadow noise cost | Small on modern sensors | More visible |
| Best for | Everyday high-contrast scenes | Harsh sun and backlighting |
For the full logic behind these choices, check the Film Simulation Picker, then jump to the ISO table below.
What Does Fujifilm Dynamic Range Actually Do?
Fujifilm dynamic range works by making the sensor record the scene one or two stops darker, then lifting the darker tones in the JPEG. That keeps bright areas from getting blown out because they started with more room before reaching the limit.
Here is the process in four steps.
- You choose DR200 or DR400: Your Fuji raises the minimum ISO, which tells the camera to use a darker exposure.
- The sensor gets less light: DR200 underexposes by one stop, while DR400 underexposes by two stops.
- Your Fuji brings things back up: The processor lifts the shadows and midtones with a tone curve for the JPEG.
- Bright areas keep more detail: Since the highlights started darker, they have more room before they lose detail.
What it is not
- Not HDR: HDR combines several exposures, while DR200 or DR400 uses one exposure.
- Not D Range Priority: D Range Priority is a separate Fujifilm feature with its own processing behavior.
Once this clicks, it becomes much easier to build a custom Fujifilm recipe without blindly copying settings.
DR100 vs DR200 vs DR400: Side-by-Side Comparison
DR100 leaves things as they are, while DR200 adds one stop and DR400 adds two stops of highlight protection. Which one makes sense depends on the light you are shooting in and how much shadow noise you are comfortable with.
Here is how the three settings compare.
| Setting | Highlight protection | Minimum ISO (base 160 body) | Shadow noise | Look | Use it for |
| DR100 | Standard processing | ISO 160 | Lowest | Natural | Flat or controlled light |
| DR200 | 1 stop | ISO 320 | Slightly higher | Natural with more highlight room | Everyday high-contrast scenes |
| DR400 | 2 stops | ISO 640 | More noticeable | Can look flatter | Harsh sun and backlight |
Quick rules
- DR100: If the light is soft and easy, DR100 keeps things simple without adding extra ISO or shadow lift.
- DR200: For everyday shooting, DR200 is a handy choice when the scene has some brighter areas.
- DR400: When the sun is harsh or you are shooting into the background, DR400 gives highlights more breathing room.
- In a studio or controlled setup, you rarely need DR200 or DR400 because you can manage the contrast yourself.
- DR Auto can choose for you, but the available range varies by camera, so check your manual.
When trying different looks, the Film Simulation Picker is a handy place to start.
Minimum ISO for DR200 and DR400 by Camera
DR200 needs about twice your camera’s base ISO, while DR400 needs about four times the base ISO. The exact numbers change with the sensor generation, so your Fuji may not match another model.
Here are the minimum ISO values by sensor family.
| Sensor generation | Example bodies | Base ISO | DR200 minimum | DR400 minimum |
| X-Trans III | X-T2, X-Pro2, X100F, X-T20, X-H1, X-E3 | ISO 200 | ISO 400 | ISO 800 |
| X-Trans IV | X-T3, X-T4, X-Pro3, X100V, X-T30 II, X-E4 | ISO 160 | ISO 320 | ISO 640 |
| X-Trans V | X-T5, X-E5, X100VI, X-T50, X-H2 | ISO 125 | ISO 250 | ISO 500 |
If DR400 is greyed out
- Raise your ISO: DR400 needs a higher starting ISO before the camera can use it.
- Check Auto ISO: Make sure your Auto ISO minimum and maximum are not preventing the setting.
- Check D Range Priority: This separate setting can affect which DR400 settings you can select.
- Check your manual: Your camera may use different limits from the sensor families shown above.
FujiPic’s Fujifilm sensors and camera guides can help you check your specific setup.
Verification note: These values do not cover every Fujifilm camera; sources disagree on bodies such as the X-S10 and X-T30 III, so verify your own camera’s figures.
When to Use DR200?
DR200 is a safe everyday choice for most daylight shooting, especially when you want a little more room in bright areas. On modern Fujifilm sensors, the extra ISO usually comes with a small noise cost, making it easy to live with.
Here are the scenes where DR200 earns its place.
- Backlit portraits: DR200 gives bright areas around your subject some extra room without pushing the shadows too far.
- Bright sky over shaded foreground: It helps hold sky detail when the ground below is noticeably darker.
- Street scenes with sun and shade: DR200 comes in handy when people move between bright sunlight and deep shade.
- Window light indoors: It can help keep bright windows from competing too heavily with the darker room.
- Travel and mixed light: DR200 is a useful default when changing light makes every scene a little unpredictable.
For the DR400 vs DR200 choice, start with DR200 when you need modest highlight protection without much extra shadow noise.
Tip: Try DR200 with Highlight -1 when you want a slightly softer, smoother highlight roll-off.
For a real recipe example, see the Soft Chrome Roll recipe, which uses DR200 with Highlight +4 and Shadow -2 on Classic
When DR400 Is Worth the Trade-Off?
DR400 protects two stops of highlights, making it useful when bright areas are genuinely at risk of losing detail. It also needs a higher minimum ISO, and that extra lift can make shadow noise more noticeable.
Here is when the trade-off makes sense.
- Use DR400 when:
- Harsh midday sun: It gives bright skies, sunlit walls, and other highlights more breathing room.
- Backlit faces and white clothing: It can help hold detail when faces and bright clothing sit against strong light.
- Bright window with a dark interior: It helps keep the window from becoming a completely white patch.
- Stage lighting: Strong spotlights can push highlights quickly, making the extra protection useful.
- Watch the cost:
- Higher minimum ISO: DR400 needs a higher starting ISO than DR200.
- More visible shadow noise: Shadows are lifted more, so noise can become easier to notice.
- Flatter contrast: Some Film Simulations can look flatter with DR400, although some photographers enjoy that film-like look.
Several FujiPic recipes build DR400 into their intended look, including Portra Sol Chrome and Warm Amber, along with Vintage Amber.
With DR400 vs DR200, think of DR400 as a tool for tricky scenes rather than a permanent default, unless you simply li
When DR100 Is the Better Choice?
DR100 keeps your camera at its base ISO and lets the Film Simulation keep its full contrast. When there is no real highlight problem, leaving DR100 on is perfectly fine.
Here are the situations where DR100 wins.
- Overcast or flat light: Dull weather usually gives you plenty of highlight room, so there is little reason to add extra DR.
- Studio and controlled lighting: When you control the light yourself, DR100 keeps the Film Simulation’s intended contrast intact.
- Long exposures with ND filters: DR100 keeps the base ISO lower, while DR200 or DR400 can shorten your exposure by one or two stops.
- Deliberate blown highlights: For silhouettes or punchier frames, letting bright areas clip can be exactly what you want.
Rule of thumb: Use DR100 when your highlights are safe and you want the Film Simulation’s natural contrast at base ISO.
Does Fujifilm Dynamic Range Affect RAW Files?
Yes, but there is an important catch: Fujifilm dynamic range changes the exposure reaching the RAW file, while the DR tone curve affects the JPEG. Your RAW converter then decides how that file first looks on screen.
Here is what to expect in each case.
- What changes in the RAW:
- The sensor records less light: DR400 captures the scene two stops darker, while DR200 captures it one stop darker.
- Highlights keep more detail: Because the sensor started with a darker exposure, bright areas have more room before clipping.
- Shadows can show more noise: Once you brighten those darker tones, the extra noise becomes easier to see.
- What does not change:
- The JPEG tone curve is not baked into the RAW: The RAW keeps the captured sensor data rather than locking in the final JPEG rendering.
- Software can show it differently: Capture One can apply compensation for Fujifilm DR settings, while other converters may initially show a darker file. Test your own software before judging the RAW.
That also explains why FujiPic’s Fujifilm film simulation recipes are designed around JPEG rendering, not rewriting your RAW file.
For in-camera RAW conversion, you can lower the DR level in playback, but you cannot raise it afterward.
DR200 and DR400 Settings Inside Fujifilm Recipes
Recipe creators usually tune Highlight and Shadow around the chosen DR level to keep the final look balanced. Change the DR setting without changing the tone settings, and the whole recipe can start looking different.
Here are real examples from the FujiPic library.
Here are real examples from the FujiPic library.
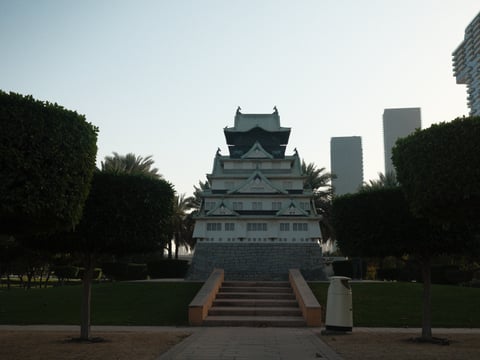
- Film Simulation: Classic Chrome
- DR: DR200
- Highlight: +4
- Shadow: -2
- Portra Sol Chrome

- Film Simulation: Classic Chrome
- DR: DR400
- Highlight: -2
- Shadow: -2
- Warm Amber
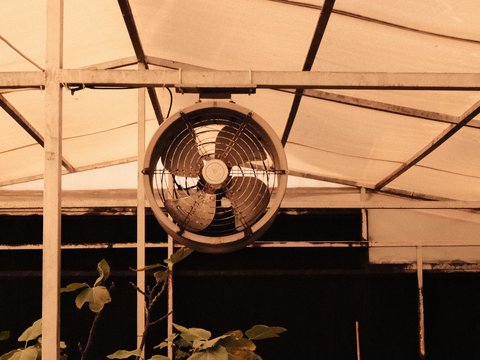
- Film Simulation: PRO Neg. Std
- DR: DR400
- Highlight: 0
- Shadow: +3
- Vintage Amber
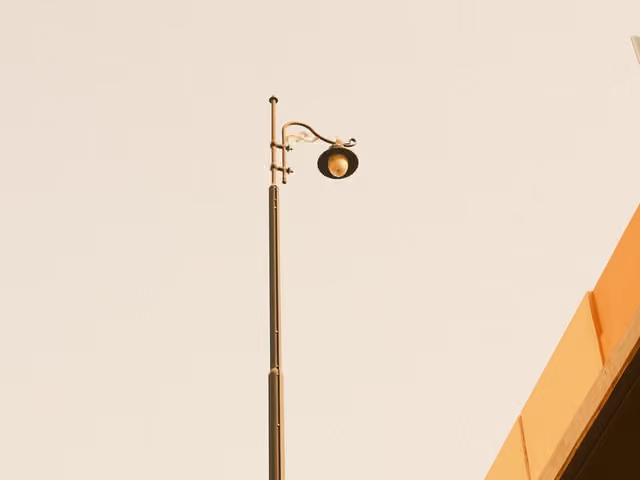
- Film Simulation: Classic Negative
- DR: DR400
- Highlight: -1.5
- Shadow: +2.5
- Astia Reverie
- Film Simulation: Astia
- DR: DR400
- Highlight: -1.5
- Shadow: -1
Across FujiPic’s [INSERT COUNT] tested recipes, [INSERT NUMBER] use DR400. Audit the full recipe library before publishing and replace both placeholders with the real numbers.
Adjusting tone when you change DR
- Lower DR: Expect harder highlights, particularly when the original recipe used stronger highlight protection.
- Raise DR: Expect flatter contrast, which can change the recipe’s overall feel.
- Retest the recipe: Try it on a real scene before saving your revised settings.
For your own custom Fujifilm recipe, treat DR as part of the recipe rather than a random setting swap.
Image note for designer: Show one FujiPic settings table screenshot, with alt text naming the recipe and DR setting.
Common DR400 and DR200 Mistakes and Fixes
Most DR problems come down to ISO limits, the scene you are shooting, or another tone setting getting in the way. The good news is that these are usually easy to spot and fix once you know what to check.
Here are the five most common mistakes.
- ISO is too low for the chosen DR
- Raise the ISO enough for your camera’s DR threshold, since lower values can make the option unavailable.
- Using DR400 in flat light
- Switch back to DR200 or DR100 when the scene has plenty of highlight room and little contrast.
- Leaving D Range Priority on
- Check D Range Priority first, because some Fujifilm bodies can restrict or override your manual DR selection.
- Pushing Highlight and Shadow too hard
- Ease back those settings when DR400 already makes the image flatter, since stacked adjustments can look overly processed.
- Forgetting DR affects JPEG tone
- Remember that the DR setting changes the JPEG rendering, so do not judge the effect from RAW alone.
Exact ISO thresholds and DR Auto behavior vary by model, so your camera manual should be the final word.
Try Dynamic Range bracketing when unsure, and compare DR100, DR200, and DR400 on the same real scene.
Related settings: You may also want to check Fujifilm White Balance Shift Explained while fine-tuning your recipe settings.
Choose Your DR Setting With Confidence
Fujifilm DR400 vs DR200 is easier to choose once you match the setting to the light in front of you. DR200 works well as an everyday choice, DR400 helps with harsh light, and DR100 fits flatter scenes, while both higher settings bring a higher minimum ISO and more shadow noise.
Here is what to do next.
- Shoot a DR bracket: Try the same scene at DR100, DR200, and DR400, then compare the highlights and shadows side by side.
- Try the Film Simulation Picker: Open the Film Simulation Picker and find a look that fits your next shoot.
- Browse tested recipes: Explore Fujifilm recipes and check each recipe’s DR setting before saving it to your camera.
Want fresh recipes in your inbox? Join 4,200+ Fujifilm photographers getting new recipes every week.
FAQs
- What is the difference between DR200 and DR400 on Fujifilm?
DR200 gives you one stop of extra highlight protection, while DR400 gives you two, but DR400 also requires a higher minimum ISO, meaning you give up some low-ISO cleanliness to keep more detail in very bright areas.
- Should I use DR400 all the time?
You do not need to leave DR400 switched on all the time, because its higher minimum ISO can reveal more shadow noise and its extra highlight protection can make some Film Simulations look flatter, although some photographers deliberately keep that softer look as part of their preferred style.
- Why can’t I select DR200 or DR400?
The usual reason is that your ISO is too low for the selected DR level, although D Range Priority can also take control of the setting on supported cameras, so check your Fujifilm cameras documentation and raise ISO before looking for a bigger problem.
- Does DR400 add noise?
DR400 can make shadow noise more noticeable because the darker exposure is lifted further, while DR200 generally has a smaller noise cost on modern Fujifilm sensors, with the difference becoming easier to notice when you brighten already-dark areas significantly during editing.
- Does dynamic range affect RAW files?
Yes, the DR setting changes the exposure reaching the sensor and therefore affects the RAW capture, while the JPEG tone curve is separate, and different RAW converters can initially display that file differently, so your own editing software is worth testing before drawing conclusions about how the setting behaves.
- What is the difference between DR400 and D Range Priority?
DR400 and D Range Priority are separate Fujifilm controls that cannot be used together, with Dynamic Range mainly controlling highlight protection while D Range Priority automatically adjusts dynamic range and tone-curve behavior together, depending on the camera model and selected mode.
- What does DR Auto do?
DR Auto lets your camera choose the Dynamic Range setting for you based on the shooting conditions, but the choices available in Auto differ between Fujifilm models, so your camera manual is the safest place to confirm exactly what it can select.
- Is Fujifilm dynamic range the same as HDR?
No, Fujifilm dynamic range uses a single exposure with a different exposure and processing approach, while HDR combines multiple exposures to capture a wider brightness range, so the two features solve contrast problems in very different ways.
.