Fujifilm C1-C7 Recipes: Best 7-Slot Setup & How to Save It
Explore the best Fujifilm C1-C7 recipes for your 7 custom slots and learn how to save them in 6 easy steps. Covers X-E5, X-T30 II, X-H1, X-T200, and XApp tips.
Finding great Fujifilm C1 C7 recipes online is exciting, but those settings won’t help you until you know which 7 looks to pick and how to lock them into your camera’s C1-C7 custom setting slots. Many Fujifilm owners type a recipe into the wrong menu, watch it disappear the moment they switch the camera off, or struggle to decide which recipes deserve a permanent spot in C1 through C7.
This friendly guide gives you a ready-to-use 7-slot starter recipe lineup, a simple 6-step saving walkthrough, and a model-by-model lookup table so your Straight-Out-Of-Camera (SOOC) JPEGs look right every time.
Here is what we will cover together:
- What C1–C7 slots do: How your camera’s 7 built-in memory slots store your favourite film looks.
- Best Fujifilm C1–C7 recipes lineup: A balanced C1 to C7 starter set for sunny days, portraits, golden hour, night, and black-and-white.
- Camera slot lookup (X-E5, X-T30 II, X-H1, X-T200 & more): Which cameras have 7 slots, 4 slots, or 0 slots.
- Easy 6-step save method & tools: How to lock recipes in, fix saving bugs, and use the Fujifilm recipe reader inside FujiPic Tools.
Let’s start with what your camera’s custom slots actually save behind the scenes.
What Are Fujifilm’s C1-C7 Custom Setting Slots?
Fujifilm cameras with 7 custom setting slots (C1–C7), or 4 slots (C1–C4) on smaller mode-dial models, let you save complete Straight-Out-Of-Camera (SOOC) JPEG film simulation recipes so you can switch looks in one click. Instead of changing a dozen menu items by hand when the light changes, you simply tap the Q button and pick your slot.
Here is what gets saved inside each slot versus what stays on your camera’s outside dials:
- Your photo’s look and colors (Saved on all C1–C7 cameras):
- Base film look: Film Simulation and Grain Effect (Strength: Off/Weak/Strong, Size: Small/Large).
- Color depth & warmth: Color Chrome Effect and Color Chrome FX Blue, Color saturation (-4 to +4), and White Balance with warm/cool R & B shift (-9 to +9).
- Contrast & detail: Dynamic Range (DR100/DR200/DR400), Highlight and Shadow Tone (-2 to +4), Sharpness (-4 to +4), High ISO Noise Reduction (-4 to +4), and Clarity (-5 to +5).
- Your focus & shooting habits (Also saved on newer 2021+ cameras):
- Autofocus settings: On newer bodies like the Fujifilm X100VI, Fujifilm X-T5, and Fujifilm X-E5, each slot also saves your AF mode and face/eye tracking.
- Camera behavior: Shutter type, image stabilization, and self-timer settings are stored inside the slot too.
- Your physical top dials (Never saved on classic dial cameras):
- Manual controls: Your physical Shutter Speed dial, lens Aperture ring, Exposure Compensation dial, and Drive dial always stay right where your fingers left them.
Best Fujifilm C1-C7 Recipes: 7-Slot Starter Lineup
The best Fujifilm C1-C7 recipes setup gives each of your 7 slots a clear everyday job, covering sunny daylight, portraits, moody weather, golden hour, landscapes, night street, and black-and-white, so you never waste two slots on the same look.
Use this balanced 7-slot starter blueprint to fill C1 through C7 with zero overlap:
- C1: Softened Daylight (Everyday & Natural Light)

Built for everyday walks and indoor window light, Softened Daylight gives your photos dreamy colors and soft, cinematic shadows.
- Film Simulation & DR: Eterna · DR200
- White Balance: Auto Ambience Priority (R -1, B -6)
- Tone & Color: Highlight -1 · Shadow -1 · Color +4
- Grain & Chrome: Grain Weak / Small · Color Chrome Strong · FX Blue Strong
- Detail & Sensors: Sharpness -2 · High ISO NR -4 · Clarity -3 (X-Trans IV & GFX)
C2: Astia Reverie (Portraits & Natural Skin Tones)
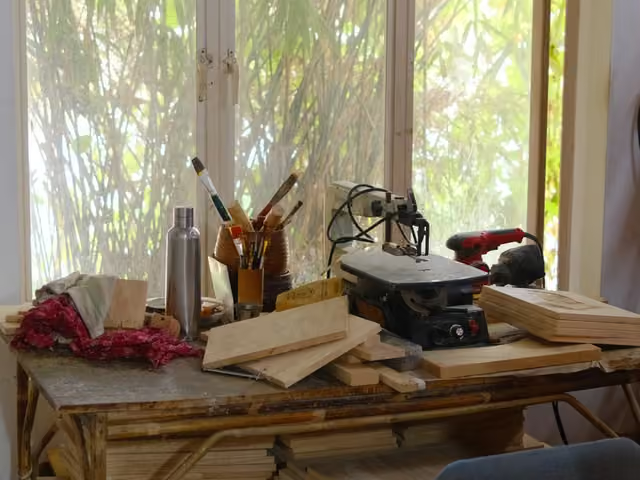
Designed for flattering photos, Astia Reverie pairs gentle contrast with warm, natural skin tones and subtle grain.
- Film Simulation & DR: Astia · DR400
- White Balance: Auto White Priority (R +2, B -4)
- Tone & Color: Highlight -1.5 · Shadow -1 · Color +3
- Grain & Chrome: Grain Weak / Small · Color Chrome Strong · FX Blue Weak
- Detail & Sensors: Sharpness -1 · High ISO NR -4 · Clarity -2 (X-Trans IV, X-Trans V & GFX)
C3: Marigold Afternoon (Warm Sun & Golden Hour)
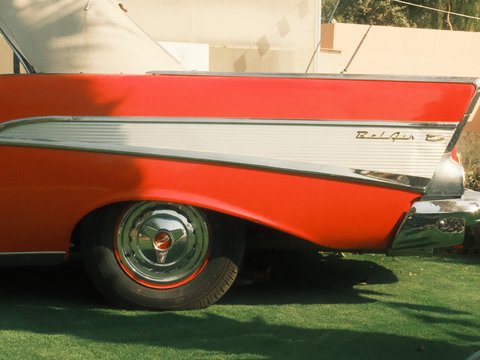
Made for late-summer sun and golden hour walks, Marigold Afternoon adds a warm, nostalgic vintage glow to outdoor scenes.
- Film Simulation & DR: Classic Negative · DR400
- White Balance: 5500K (R +3, B -7)
- Tone & Color: Highlight -1 · Shadow -1 · Color +1
- Grain & Chrome: Grain Weak / Small · Color Chrome Off · FX Blue Weak
- Detail & Sensors: Sharpness 0 · High ISO NR -4 · Clarity -4 (X-Trans IV & GFX)
C4: Night Reversal (Night Street & Vivid Landscapes)

Tuned for city lights after dark and bold outdoor scenery, Night Reversal delivers punchy contrast and rich, saturated colors.
- Film Simulation & DR: Velvia · DR400
- White Balance: Auto (R +2, B -2)
- Tone & Color: Highlight +1 · Shadow +1 · Color +2
- Grain & Chrome: Grain Strong / Small · Color Chrome Strong · FX Blue Strong
- Detail & Sensors: Sharpness +1 · High ISO NR -2 · Clarity +1 (X-Trans IV, X-Trans V & GFX)
C5: Expired Reala Warmth (Nostalgic Film & Bold Grain)
Built for modern 5th-gen sensors, Expired Reala Warmth combines rich, muted colors with bold grain for an authentic expired-film look.
- Film Simulation & DR: Reala Ace · DR400
- White Balance: 6700K (R +1, B +4)
- Tone & Color: Highlight -1.5 · Shadow +1.5 · Color -2
- Grain & Chrome: Grain Strong / Large · Color Chrome Strong · FX Blue Strong
- Detail & Sensors: Sharpness -2 · High ISO NR -4 · Clarity -3 (X-Trans V & GFX)
C6: Coral Negative (Soft Travel & Street Tones)

Great for travel and overcast street walks, Coral Negative delivers warm coral-tinted tones with crisp midtone pop and soft edges.
- Film Simulation & DR: Classic Negative · DR Priority Auto
- White Balance: Auto White Priority (R +3, B -5)
- Tone & Color: Highlight 0 · Shadow 0 · Color +3
- Grain & Chrome: Grain Strong / Small · Color Chrome Strong · FX Blue Weak
- Detail & Sensors: Sharpness -3 · High ISO NR -4 · Clarity +3 (X-Trans IV, X-Trans V & GFX)
C7: Acros Smoke Tone (Street & Architecture Black-and-White)

No C1–C7 lineup is complete without a dedicated monochrome slot, and Acros Smoke Tone gives urban street scenes and architecture smooth shadows with classic film grain.
- Film Simulation & DR: Acros · DR400
- White Balance: 4000K (R 0, B -5)
- Tone & Color: Highlight 0 · Shadow -2 · Monochromatic WC 0 / MG 0
- Grain & Chrome: Grain Strong / Small · Color Chrome Strong · FX Blue Strong
- Detail & Sensors: Sharpness -2 · High ISO NR -4 · Clarity 0 (X-Trans IV, X-Trans V & GFX)
How to Customize Your 7-Slot Lineup?
You don’t have to keep the exact same 7 recipes forever, start with this 7-role structure, see which slots you use most over two weekends, and swap out the rest. If you shoot on a Fujifilm X-E5 or Fujifilm X-T30 III with a physical Film Dial, tip your C1–C7 slots toward film simulations that aren’t printed on the top dial (like Eterna or Nostalgic Neg.), and use FujiPic Tools to match recipes to your exact camera sensor.
How Many Custom Slots Does Your Fujifilm Camera Have?
Most Fujifilm cameras have 7 custom setting slots (C1–C7), while mode-dial models like the Fujifilm X-S20, X-S10, and X-M5 have 4 slots (C1–C4), and entry-level Bayer cameras like the Fujifilm X-T200 have 0 custom slots.
Check your camera model in the table below to see its exact slot count and dial behavior:
| Camera Model | Custom Slots | How Recipes Work on This Camera |
| Fujifilm X100VI & Fujifilm X-T5 | 7 (C1–C7) | 5th-gen X-Trans V; keeps 7 photo slots and 7 separate video slots (Fujifilm X100VI Manual). |
| Fujifilm X-E5 & X-T50 | 7 (C1–C7) + FS1–FS3 | Holds 10 recipes total for Fujifilm X-E5 film recipes (7 in C1–C7 + 3 on the top FS1–FS3 dial) |
| Fujifilm X-T30 III | 7 (C1–C7) + FS1–FS3 | Has C1–C7 in the menu plus a separate FS1–FS3 Film Simulation dial on top |
| Fujifilm X-T30 II & X-E4 | 7 (C1–C7) | Great for Fujifilm xt30ii recipes, saves White Balance Shift per slot inside all 7 banks. |
| Fujifilm X-H2 / X-H2S | 7 (C1–C7) | All 7 C1–C7 slots sit right on the top PASM mode dial |
| Fujifilm X-S20 & X-S10 | 4 (C1–C4) | Turn the top mode dial directly to C1–C4 to switch recipes |
| Fujifilm X-M5 | 4 (C1–C4) + FS1–FS3 | C1–C4 on the mode dial + 3 extra slots on the left FS1–FS3 film dial |
| X100V / X-T4 / X-Pro3 | 7 (C1–C7) | Classic IQ-only slots, saves WB Shift per slot without locking your focus settings |
| Fujifilm X-H1 / X-T3 / X-T30 (Gen 1) / X-Pro2 | 7 (C1–C7) | For Fujifilm X-H1 film recipes, you get 7 IQ slots, but WB Shift is shared globally per WB mode |
| Fujifilm X-T200 / X-T100 / X-A Series | 0 (None) | No C1–C7 slots; for Fujifilm X-T200 recipes, dial settings straight into the live I.Q. menu. |
The Golden Rule for X-E5, X-T50, X-T30 III & X-M5 Owners:
If your camera has a physical Film Simulation dial on the top left, that dial overrides your C1–C7 menu settings whenever it is sitting on a film name. Always turn that physical dial to the C position when shooting with your C1–C7 slots so your saved recipe’s film simulation actually loads. If your model isn’t listed above, you can check its exact slot and sensor specs in seconds with FujiPic’s interactive camera tools.
How to Save a Recipe to C1-C7 Slots (Step-by-Step)
Saving a recipe works the same way across nearly every modern Fujifilm X Series and GFX camera, taking less than two minutes once you know where the save screen hides.
Grab your camera and follow these 6 simple steps:
Copy your favourite focus setup first (for newer 2021+ cameras):
- Why do this: On newer models (X-T5, X100VI, X-E5, X-T50, X-T30 II), C1–C7 also saves your autofocus and timer settings.
- The quick trick: Set up your normal everyday focus in C1 first, then go to Edit/Save Custom Setting > Copy and copy C1 to C2–C7 so your focus stays identical across every slot.
Open theEdit/Save Custom Settingscreen:
- Menu path: Press MENU/OK, go to the I.Q. (Image Quality Setting) tab, and select Edit/Save Custom Setting.
- Fast Q button shortcut: Press the Q button once to open the Quick Menu grid, and then press and hold Q to jump straight in.
- (Tip: Open the Q grid first, holding Q from the normal shooting screen edits the Q menu icons instead!)
Pick your slot (C1–C7orC1–C4):
- Select a bank: Highlight an empty slot (Create New C1–C7) or one you want to replace and press MENU/OK.
- Open the settings list: Tap Edit/Check to see all the recipe controls in one place.
Input your recipe parameters from top to bottom:
- Film & grain: Set your Film Simulation, Grain Effect (Off/Weak/Strong and Small/Large), and Color Chrome Effect and Color Chrome FX Blue.
- White balance & shift: Choose your White Balance, then push the joystick/arrow pad right to dial in the Red (R) and Blue (B) shift numbers.
- Tones & detail: Set Dynamic Range (DR100/200/400), Tone Curve (Highlight & Shadow -2 to +4), Color (-4 to +4), Sharpness (-4 to +4), High ISO NR (-4 to +4), and Clarity (-5 to +5). (If DR200 or DR400 is grayed out, switch ISO to Auto or raise ISO to 500–640 to unlock it.)
Save and lock your adjustments:
- Make it stick: Press DISP/BACK once, select Save Current Settings (or Save the Changes), and press OK.
- Prevent accidental overwrites: Double-check the slot number before tapping OK, since saving over an old slot replaces it right away.
Recall your recipe anytime with theQbutton:
- Switch looks in 2 seconds: Press Q while shooting, highlight the top-left Custom Setting box, and spin the rear command dial to pick C1 through C7 (or turn the top mode dial on C1–C4 bodies).
Two Settings You Still Control by Hand
Your physical top Exposure Compensation dial (brightness) is never locked inside a custom slot, so you can freely brighten or darken shots for the light in front of you. Also, pre-2019 bodies (like the X-H1 and X-T3) handle White Balance Shift differently, which we cover below.
Still building your recipe from scratch? How to Build a Custom Fujifilm Recipe From Scratch covers every setting before you ever touch C1-C7.
Image Quality Menu vs. Custom Settings: Key Differences
The Image Quality (I.Q.) menu is where you adjust live JPEG settings one by one for your current shot, while a Custom Setting (C1–C7) is a saved snapshot of that menu that loads all at once. Picture the I.Q. menu as your kitchen workbench, and C1–C7 as seven labelled glass jars that hold your finished recipes.
Here is how the two compare while you are out taking photos:
| Feature | The Live I.Q. Menu (Workbench) | A C1–C7 Custom Slot (Saved Jar) |
| Main Job | Changes one live setting at a time (also how you use Fujifilm X-T200 recipes) | Loads an entire 10-part film recipe in one click |
| When It Is Active | When the top-left Q box shows P, A, S, or M | When the top-left Q box shows C1 through C7 |
| If You Tweak a Value Mid-Walk | Stays however you left it until you change it back | Resets cleanly back to your saved recipe when powered off |
Why Changing a Setting Mid-Shoot Doesn’t Ruin Your Slot
When you load C1 and tweak a single value in the I.Q. menu mid-shoot, your camera puts a tiny red dot next to that setting to show it is a temporary edit. As long as I.Q. > Auto Update Custom Setting is set to Disable on newer cameras, that quick tweak won’t overwrite your saved recipe. When you turn the camera off and back on, C1 resets right back to your original saved numbers.
Why Isn’t My Custom Setting Saving Properly?
If your custom setting keeps disappearing when you turn the camera off, or the colors look nothing like the example photos, one of six default menu switches is almost always the culprit.
Find your symptom in this quick table for a 10-second fix:
| Problem You See | Why It Happens | The 10-Second Fix |
| Settings vanish after power-off | You typed the recipe into the live I.Q. menu instead of saving it inside Edit/Save Custom Setting. | Open I.Q. > Edit/Save Custom Setting and tap Save Current Settings. |
| Your saved recipe slowly changed on its own | Auto Update Custom Setting is turned on, saving every quick mid-shoot tweak over your slot. | Set I.Q. > Auto Update Custom Setting to Disable. |
| White Balance shift won’t stick per slot | Older cameras (X-H1, X-T3, X-T30 Gen 1, X-E3, X100F) only save one WB shift per WB type globally. | Assign each slot a different WB mode (Auto, Daylight, Shade, Kelvin). |
| Slot got overwritten by mistake | Saving to an occupied slot replaces the old recipe right away with no second warning screen. | Always double-check the C1–C7 number before pressing OK, or recover the old look using a Fujifilm recipe reader |
| Film Simulation line is grayed out | On the X-E5, X-T30 III, X-T50, and X-M5, the physical top Film dial overrides C1–C7. | Rotate the physical Film Simulation dial on top of your camera to C. |
| Colors look different than expected | Easy-to-miss color settings or a different camera sensor are changing the final look. | Check Color Chrome Effect and Color Chrome FX Blue, Clarity, and sensor match in FujiPic Tools. |
Still Not Getting the Exact Colors You Want?
Sometimes every setting is saved properly in your slot, but harsh lighting or scene contrast makes the photo look different from what you expected. If your JPEGs still don’t look right after saving a slot correctly, Fujifilm JPEG or RAW: Do Your Photos Actually Need Editing? is a useful next check.
How to Name Slots & Use a Fujifilm Recipe Reader?
While you can label a slot inside the main menu using Edit Custom Name, the Quick Menu (Q button) box still only displays “C1” through “C7” while you shoot, and resetting a slot wipes the custom name completely.
Because the camera only shows “C1–C7” at a glance (and doesn’t show which recipe you used on old photos), use these three simple tricks to never lose a recipe:
- Recover forgotten settings with a Fujifilm recipe reader: If you overwrote a slot last month and can’t remember which recipe took your favourite photo, drop that original JPEG into the Fujifilm recipe reader inside FujiPic Tools to instantly extract all 14 hidden EXIF recipe settings (Film Simulation, WB Shift, Tone Curve, Grain, and Color Chrome).
- Number slots by shooting priority: Keep C1 for your everyday walkaround recipe, C2 for portraits, C6 for night, and C7 for black-and-white so you know every slot by muscle memory.
- Add a menu label for backup: Type a short name into Edit/Save Custom Setting > Edit Custom Name so the recipe title still appears when you open the full I.Q. menu list.
Does White Balance Shift Save on Every Camera?
No, on the Fujifilm X-H1, X-T3, original X-T30 (Gen 1), X-T2, X-Pro2, X-E3, and X100F, White Balance shift (R and B color tweaks) is stored globally per White Balance type instead of inside each individual C1–C7 slot. Starting with the X-Pro3, X100V, X-T4, and X-T30 II onward, Fujifilm updated this so WB shift saves independently inside every custom slot.
Check this table to see how your camera handles White Balance Shift:
| Camera Group | Models Included | Does WB Shift Save Inside Each Slot? |
| Late 2019 & Newer Bodies | X100VI, X100V, X-T5, X-T4, X-E5, X-E4, X-T50, X-T30 III, X-T30 II, X-S20, X-S10, X-Pro3, X-M5 | Yes! Every C1–C7 slot remembers its own independent R/B color shift. |
| Pre-Late 2019 Bodies | X-H1, X-T3, original X-T30 (Gen 1), X-T2, X-T20, X-Pro2, X-E3, X100F | No. Two slots that both use Auto White Balance share the exact same R/B shift. |
The Easy Workaround for X-H1, X-T3 & Older Cameras:
If you are programming Fujifilm X-H1 film recipes or shooting on an X-T3 or original X-T30, simply give each slot a different White Balance base, just like the 7-Slot Starter Table earlier (Auto for C1, Daylight for C2, Shade for C3, Kelvin for C4, Fluorescent 1 for C5, Incandescent for C6, and Custom 1 for C7). Because your camera remembers a separate R/B shift for each of those different White Balance modes, all 7 slots keep their own unique color tint.
What Happens If You Run Out of C1-C7 Slots?
Once all seven C1–C7 slots (or four C1–C4 slots) are full, saving a new recipe means overwriting an existing one, Fujifilm cameras do not let you add extra custom slots in the menu.
Before you erase a recipe you love, try these three clever tricks to stretch your slots:
- Use the hidden “8th Bonus Slot” (P/A/S/M):
- How to find it: In the Q menu, turn the dial one click past C1 until the top-left box shows your regular exposure mode (P, A, S, or M).
- Why it helps: That mode uses whatever settings are sitting in your live I.Q. menu, giving you a free 8th recipe slot (or a 5th slot on C1–C4 cameras).
- UseFS1–FS3on Film Dial cameras:
- How to find it: On the Fujifilm X-E5, Fujifilm X-T30 III, X-T50, and X-M5, go to I.Q. > Film Simulation Dial Setting to save 3 extra recipes onto FS1, FS2, and FS3.
- Why it helps: Combined with C1–C7, you can store up to 10 custom recipes inside your camera at once.
- Keep situational looks in a cloud collection:
- How it works: Save your 7 camera slots for the recipes you shoot every week, and store situational looks in FujiPic’s saved recipe collections and FujiPic Tools.
- Why it helps: Whenever you want to reload an old look, or extract one from a past JPEG with the Fujifilm recipe reader, your settings are ready to copy back in 60 seconds.
Start With Settings Built For Your Camera Slots
Now that you have a 7-slot starter plan, the exact 6-step save method, and quick fixes for every saving quirk, you can switch between C1–C7 film looks in two seconds without ever getting lost in the menus.
Here is the fastest way to set up and manage your camera slots today:
- Use the Fujifilm recipe reader & slot tools on FujiPic Tools: Extract hidden recipe settings from any Fujifilm JPEG, check sensor compatibility for your exact camera body, and view settings in camera-menu order.
- Keep unlimited favourites outside the 7-slot limit: Create a free FujiPic account or explore FujiPic’s saved recipe collections to organize your favourite recipes beyond your camera’s 7 slots.
- Skip the guesswork and start shooting: Browse the full recipe library and open FujiPic Tools to copy pre-built settings straight into your C1–C7 slots.
Before filling your C1-C7 slots, use FujiPic Tools to check recipe compatibility with your camera or extract settings from a favourite Fujifilm JPEG.
Frequently Asked Questions
1. How many custom settings does a Fujifilm camera have?
Most Fujifilm X Series cameras have 7 custom setting slots (C1–C7), including the X100VI, X100V, X-T5, X-T4, X-E5, X-T50, X-T30 III, X-T30 II, and X-H1. Mode-dial cameras like the X-S20, X-S10, and X-M5 have 4 slots (C1–C4). Older entry-level bodies like the Fujifilm X-T200 have 0 custom slots and use the live Image Quality menu directly.
2. What’s the difference between C1-C4 and C1-C7 cameras?
The main difference is how many recipes you can store and how you switch between them. C1–C4 cameras (X-S20, X-S10, X-M5) place four custom slots right on the physical top mode dial. C1–C7 cameras (X100VI, X-T5, X-T30 II) store seven slots inside the Q Quick Menu.
3. How do I save a recipe to a custom setting slot?
Go to MENU/OK > I.Q. (Image Quality Setting) > Edit/Save Custom Setting, choose a slot (C1–C7), and tap Edit/Check to enter your recipe parameters. When finished, press DISP/BACK once and select Save Current Settings (or Save the Changes) followed by OK. You can then switch slots anytime using the Q button.
4. Can I name my custom settings?
You can type a custom name inside Edit/Save Custom Setting > Edit Custom Name, but the Quick Menu (Q button) box still only displays “C1” through “C7” while you shoot. Resetting a slot also deletes its name. If you ever forget which recipe took an older photo, you can drop the JPEG into the Fujifilm recipe reader on FujiPic Tools to reveal every setting.
5. Why did my custom setting disappear or change?
Sometimes when the settings disappeared after turning off the camera, it was because you entered them in the live I.Q. menu instead of storing them in Edit/Save Custom Setting. The Auto Update Custom Setting is activated if your saved recipe gradually changes on its own over time. Go to I.Q. > Auto Update Custom Setting and set it to Disable so your recipes stay locked.
6. Can I back up my Fujifilm recipes using the XApp?
Yes, the Fujifilm XApp lets you back up and restore all of your camera’s settings, including your C1–C7 recipes, right from your phone. Just remember that restoring an XApp backup overwrites every camera setting at once, including your custom buttons and focus settings. It is best used for full-camera backups before firmware updates rather than updating a single slot.
7. Does exposure compensation save inside a custom setting?
No, on Fujifilm cameras with a physical Exposure Compensation dial (like the X100VI, X-T5, X-E5, X-T50, and X-T30 III), brightness is controlled by that top dial and is never saved inside a custom slot. That is actually helpful, since lighting changes from scene to scene. Just turn the dial by eye whenever a shot looks too bright or too dark.
8. Can I transfer a custom setting to a different camera body?
Using the Fujifilm XApp backup tool, you can only copy custom settings to another camera of the exact same model (like one X-T5 to another X-T5). To move a recipe to a different model, such as adapting X100VI settings for Fujifilm X-T30 II recipes or Fujifilm X-H1 film recipes, enter the numbers by hand into the second camera’s Edit/Save Custom Setting menu and check sensor compatibility.