Fujifilm Color Chrome Effect: What It Does and How It Works
Fujifilm Color Chrome Effect explained: what it does, Weak vs Strong settings by simulation, which cameras have it, and when to use it. Read the full guide.
Ever switched on Fujifilm Color Chrome Effect in the menu, looked at your photo, and wondered what actually changed?
That’s pretty common because the difference can be subtle, especially in scenes without deep, saturated colours. Some scenes reveal it straight away; others barely show a difference, even when the setting is on.
A quick before-and-after helps, but knowing what to look for makes the setting easier to judge in your own shots.
We’ll look at what the setting changes, when Weak or Strong makes sense, and which Fujifilm cameras include it. We’ll also cover film simulation pairings that make it easier to judge the effect while building a JPEG recipe.
First, let’s look at what Color Chrome Effect actually changes in the photo, beyond the menu toggle.
What Is the Fujifilm Color Chrome Effect?
Fujifilm Color Chrome Effect is an in-camera image-quality setting inspired by FUJICHROME Fortia slide film that deepens tonal separation in highly saturated colours, including reds, oranges, yellows, and greens, helping preserve visible gradation without simply increasing the image’s overall saturation.
Think of it as keeping strong colours from turning into one flat patch when light and contrast get intense. It is easiest to spot outdoors, where bright reds, orange flowers, autumn leaves, and greens can lose detail.
- What it changes: Tonal gradation and depth within saturated colours, rather than directly changing hue or increasing the camera’s Color setting.
- Where it applies: In-camera JPEGs and in-camera RAW conversion. FUJIFILM X RAW STUDIO also supports it, but it is not a universal control in third-party RAW editors.
- Available settings: Off disables the effect, Weak applies a subtler adjustment, and Strong applies a more pronounced effect.
How Does Color Chrome Effect Actually Work?
Color Chrome Effect expands tonal gradation within already-saturated colours, preserving detail and depth instead of letting strong colours appear flat.
The difference comes down to how the camera renders colour:
- Without the effect: Highly saturated colours in harsh light can lose internal detail and look like flat blocks.
- With the effect: Tonal gradation becomes more visible within those colours, without simply increasing overall saturation.
- Little visible change: Desaturated scenes, such as grey overcast skies, may show hardly any difference.
Where does this make a difference?
- Sunsets and golden-hour skies: More tonal variation in vivid orange and red clouds.
- Saturated foliage: Better tonal separation in sunlit green leaves and autumn colours.
- Red or orange products: More visible detail in brightly coloured fabric, paint, and packaging.
- Neon signage at night: More tonal depth in saturated red, orange, and green signs.
The trade-off: JPEG processing can take longer, and some Fujifilm bodies disable the effect during continuous high-speed burst shooting.
Want to see which film simulations suit your preferred look? Explore FujiPic’s free photography tools to find a starting point for your next JPEG recipe.
Color Chrome Effect vs Color Chrome FX Blue: What’s the Difference?
On Fujifilm cameras, the standard Color Chrome Effect adds tonal depth to saturated reds, oranges, yellows, and greens. By contrast, Color Chrome FX Blue targets blue tones specifically. Each feature has its own Off, Weak, and Strong settings.
| Setting | What It Changes | Introduced | Found On |
| Color Chrome Effect | Tonal gradation in saturated colours, especially reds, yellows, and greens | GFX 50S (2017) | GFX 50S and supported later X Series and GFX cameras |
| Color Chrome FX Blue | Tonal gradation in blue tones, including skies and water | X-Pro3 (2019) | X-Pro3 and selected later X Series and GFX cameras |
Color Chrome FX Blue arrived with the X-Pro3 in 2019. It is designed to deepen blue tones and works with Classic Chrome, Classic Negative, Eterna, and Eterna Bleach Bypass.
The common mistake: Not every Fujifilm camera with Color Chrome Effect also has FX Blue. The original X-T3 and X-T30 lack the blue-specific setting, while the X-Pro3 includes both. Check the camera compatibility table below before looking for both controls in your menu.
Which Fujifilm Cameras Have Color Chrome Effect?
Color Chrome Effect first shipped on the GFX 50S, reached the X Series with the X-T3 and original X-T30, and is now standard on every current-generation X Series and GFX body as of 2026, while Color Chrome FX Blue support varies by camera and sensor generation.
Cameras With Both Color Chrome Effect and FX Blue
The following Fujifilm cameras have both settings listed in their official owner manuals. The table covers selected models across several sensor generations.
| Camera | Sensor generation / system | Color Chrome Effect | FX Blue |
| X100VI | X-Trans V | Yes | Yes |
| X-T5 | X-Trans V | Yes | Yes |
| X-T50 | X-Trans V | Yes | Yes |
| X-E5 | X-Trans V | Yes | Yes |
| X-H2 | X-Trans V | Yes | Yes |
| X-H2S | X-Trans V | Yes | Yes |
| X-S20 | X-Trans IV + X-Processor 5 | Yes | Yes |
| X-T30 III | X-Trans IV + X-Processor 5 | Yes | Yes |
| X-M5 | X-Trans IV + X-Processor 5 | Yes | Yes |
| X-Pro3 | X-Trans IV | Yes | Yes |
| X100V | X-Trans IV | Yes | Yes |
| X-T4 | X-Trans IV | Yes | Yes |
| X-S10 | X-Trans IV | Yes | Yes |
| X-E4 | X-Trans IV | Yes | Yes |
| X-T30 II | X-Trans IV | Yes | Yes |
| GFX100 | GFX large format | Yes | Yes |
| GFX100 II | GFX large format | Yes | Yes |
| GFX100S | GFX large format | Yes | Yes |
| GFX100S II | GFX large format | Yes | Yes |
| GFX100RF | GFX large format | Yes | Yes |
Menu availability can vary with shooting mode, so check your camera’s manual if either setting appears unavailable.
Cameras With Color Chrome Effect Only (No FX Blue)
These three models list Color Chrome Effect but not the separate FX Blue control in their official owner manuals.
| Camera | Sensor generation / system | Color Chrome Effect | FX Blue |
| X-T3 | X-Trans IV | Yes | No |
| X-T30 (original) | X-Trans IV | Yes | No |
| GFX 50S | GFX large format | Yes | No |
One thing to remember: FX Blue support does not follow a simple sensor-generation cutoff, so check the exact model rather than relying on its sensor family alone.
Weak vs Strong: Which Color Chrome Effect Setting Should You Use?
Weak is the safer default for most scenes because it keeps the effect subtle, while Strong suits highly saturated scenes where deeper colour separation matters most. Think sunsets, vivid foliage, and colourful product shots.
Strong can sometimes make extremely saturated reds look too heavy, reducing the subtle detail you want to retain. This matters especially for skin tones and photographers who inspect their JPEGs at 100%.
Use Strong when:
- Golden hour and sunsets: Bring more depth to saturated orange and red skies.
- Saturated landscape greens: Add tonal depth to vivid foliage in bright sunlight.
- Product and still-life shots: Give strongly coloured objects more separation under high-contrast lighting.
Use Weak or Off when:
- Portraits and skin tones: Keep colour rendering more natural, especially when red tones dominate the scene.
- Flat or overcast light: Skip the effect when the scene has few saturated colours to work with.
- Maximum fine detail matters: Choose Weak or Off when subtle texture and tonal variation are your priority.
Before saving a recipe to a Custom Setting slot, compare the results using FujiPic’s Film Simulation Picker and choose the look that suits your scene.
Does Color Chrome Affect Skin Tones in Portraits?
Yes, it can affect skin because warm red-orange tones overlap with the saturated colours this setting is designed to render. At Strong, those tones can look denser, with less subtle tonal detail and lower perceived micro-contrast in some portraits. That trade-off is why Off or Weak is a safer starting point for many portrait-focused recipes.
For most portrait work, Weak adds a little depth without making skin look noticeably processed. Strong suits editorial or high-contrast portraits where richer colour and a more graphic finish are intentional.
For more practical starting points, browse our Fujifilm portrait recipes for natural skin tones.
For weddings and events, test it on real skin in your actual lighting before saving a Custom Setting slot. Rear-screen and monitor previews can mislead, so judge the saved JPEGs rather than trusting the display alone.
Best Film Simulation and Color Chrome Effect Pairings
Color Chrome Effect works best as a starting point with film simulations that produce rich colours or strong contrast. Velvia, Classic Chrome, Classic Negative, and Astia are worth testing first, while Provia and Eterna usually give a subtler result.
| Film Simulation | Recommended Color Chrome Effect | Why |
| Velvia | Strong | Rich landscapes and vivid colours |
| Classic Chrome | Weak or Strong | Deeper colours with a vintage look |
| Classic Negative | Weak | Rich colours with a nostalgic feel |
| Astia | Weak | Subtle depth for softer colour |
| Provia | Weak or Off | Balanced, everyday colour |
| Eterna | Weak or Off | Muted colours and cinematic tones |
| Acros | No visible effect | Black-and-white rendering |
One thing to remember: Acros and other black-and-white simulations are visually unaffected by Color Chrome Effect because it works on colour, not monochrome tones. There is no benefit to changing this setting for a purely black-and-white JPEG.
Not sure which film simulation fits your shooting style first? Use FujiPic’s free Film Simulation Picker to find a suitable starting point. Browse the FujiPic recipe library for ready-made combinations with Color Chrome Effect settings already chosen.
Two Fujifilm Recipe Examples Using Color Chrome Effect
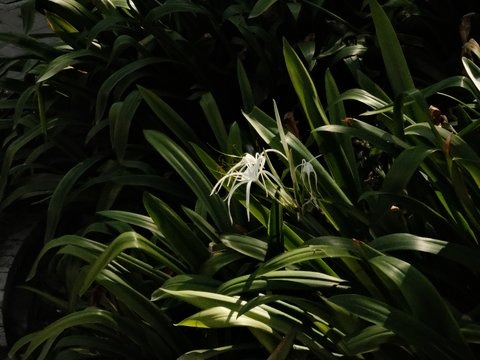
Film Simulation: Classic Chrome
Color Chrome Effect: Strong
Kodachrome Shade gives street and travel photos warm, nostalgic colours with subtle grain. Its Classic Chrome base, deep shadows, and cool white-balance shift suit urban scenes, colourful architecture, and golden-hour light.
Key settings: DR200, Highlight +0.5, Shadow -4, Color +2, Sharpness +3, Grain Weak/Small, White Balance Auto, WB Shift R +2 / B -5.
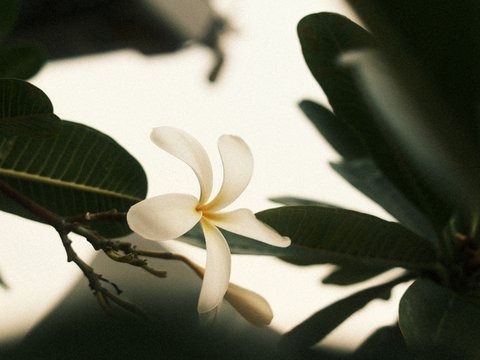
Film Simulation: Classic Negative
Color Chrome Effect: Strong
Color Chrome FX Blue: Strong
Old Ivory Roll creates a warm, grainy look with heavy shadows and an aged-print feel. It suits overcast city streets, weathered buildings, evening walks, and documentary-style photography.
Key settings: DR400, Highlight +2, Shadow +3, Color -1, Sharpness -2, Noise Reduction -4, Clarity -3, Grain Strong/Large, White Balance 7350K, WB Shift R -1 / B -4.
Does Color Chrome Effect Work on RAW Files?
Yes, you can apply Color Chrome Effect to a RAW file after capture, but it does not permanently alter the original RAW data. Use Fujifilm’s in-camera RAW conversion tool or FUJIFILM X RAW STUDIO to apply different settings without reshooting.
How it works
- At capture: The setting affects the camera-rendered JPEG, not the original RAW data.
- After capture: Apply the effect through in-camera RAW conversion or X RAW STUDIO.
- RAW+JPEG shooting: Keep the original RAW file while testing different Color Chrome settings on converted copies.
- Image data: Your original RAW file remains available for further adjustments.
What about Lightroom and Capture One?
Third-party RAW processors do not reproduce Fujifilm’s Color Chrome Effect processing exactly. For a closer match to Fujifilm’s own rendering, use in-camera RAW conversion or X RAW STUDIO.
Does Color Chrome Effect Slow Down Your Camera?
Yes, Color Chrome settings can increase in-camera processing time, but the impact depends on your camera model and generation.
What changes when it’s enabled?
- Processing time: The camera may take longer to process each JPEG.
- Burst shooting: Some bodies restrict continuous shooting while the setting is active.
- Continuous autofocus: Certain models may restrict AF-C under specific settings.
Fujifilm documented these limitations on the original GFX 50S, including roughly one second of processing time. Newer models may behave differently, so check your camera’s manual.
Shooting sports, wildlife, or fast action?
Test your exact camera with Color Chrome enabled before a paid or time-critical shoot. Check burst performance and continuous autofocus under your intended settings.
Prefer to avoid the delay during capture?
Shoot RAW and apply Color Chrome afterward through in-camera RAW conversion. Your original RAW file remains available for further adjustments.
How to Turn On Color Chrome Effect on Your Fujifilm Camera?
The menu path is broadly similar across current Fujifilm X Series and GFX bodies, although button layouts and shortcuts vary by model.
- Open Image Quality Settings. Press MENU/OK, then select Image Quality Setting in the Shooting Menu. On supported models, press Q to open the Quick Menu, then press and hold Q while it is displayed to jump to Edit/Save Custom Setting. This shortcut is not available on every model, so use the Shooting Menu path when needed.
- Find Color Chrome Effect. Scroll through the image-quality options and select Color Chrome Effect. Look for Color Chrome FX Blue separately if your camera supports it.
- Choose your preferred strength. Select Off, Weak, or Strong. Start with Weak for everyday shooting, then compare it with Strong on saturated colours.
- Save your recipe. Select Edit/Save Custom Setting and save your settings to an available Custom Setting bank. The bank numbers vary by camera, so check the table below before choosing a slot.
- Take a test shot. Photograph something with rich colour, such as red flowers, orange buildings, or green foliage. Compare the results because grey skies and muted scenes may show little visible change.
Follow our guide on how to save a Fujifilm recipe to Custom Setting banks to save and recall your preferred JPEG settings.
Final Thoughts
Color Chrome Effect adds depth to saturated colours, with Weak offering a subtler look and Strong suiting vivid scenes. Camera support varies, especially for FX Blue, so check your model before choosing your settings.
Testing different film simulations and Color Chrome combinations by trial and error takes time and fills memory cards. FujiPic’s free tools help you explore options and find a suitable starting point for your JPEG recipes.
Explore FujiPic’s free photography tools to spend less time guessing and more time shooting.
Frequently Asked Questions
1. Why is Color Chrome Effect greyed out on my Fujifilm camera?
The setting may be unavailable because of your selected shooting or drive mode. Fujifilm manuals confirm that available image-quality options vary by mode, and some models disable the effect during bracketing or burst photography.
2. Can I add Color Chrome Effect to the Q menu?
Yes, supported Fujifilm cameras let you customise the Q menu to access Color Chrome Effect more quickly. Open the Q menu settings and add the option to your preferred layout, provided your camera supports it.
3. Does Color Chrome Effect change exposure settings?
No, Color Chrome Effect does not replace your shutter speed, aperture, or ISO controls. It changes the camera’s image rendering, so the resulting JPEG can look different even when your exposure settings remain unchanged.
4. Does Color Chrome Effect affect the camera’s histogram?
Yes, the rendered JPEG preview can influence the histogram displayed by your camera. When shooting RAW, remember that the histogram reflects the rendered preview rather than providing a direct view of the unprocessed sensor data.
5. Can I apply Color Chrome Effect to an existing JPEG?
No, you cannot switch the original in-camera effect retroactively for an already-rendered JPEG. You can approximate its appearance with colour and tonal adjustments in editing software, but the result may not match Fujifilm’s processing exactly.
6. Does Color Chrome Effect work with flash photography?
Yes, you can use the setting with flash photography on compatible cameras when the option is available. Its visible impact depends on the colours in your subject and how the flash and ambient light illuminate the scene.
7. Can I use Color Chrome Effect with adapted lenses?
Yes, the setting works through the camera’s image-processing system, so it is not limited to Fujifilm lenses. Its availability depends on the camera body and shooting mode, rather than whether you use a native or adapted lens.
8. Why do my Fujifilm photos look different on the camera screen and computer?
Differences in screen brightness, display calibration, and colour management can make the same JPEG look different across devices. Check the actual exported JPEG on a calibrated display before changing your recipe settings to compensate for a screen that renders colours inaccurately.